Taillight Reroute for a Suspension SeatpostUpdated 5 months ago
A suspension seatpost is an excellent upgrade for your Centauri 2! Smooth the bumps, save the booty. However, a suspension seatpost will not allow for the rear light wire to be routed through the seat tube due to its solid-tube construction. Here's a guide for rerouting the rear light to the back of a Vvolt rear rack, or another rear rack of your choosing.
Tools Required
- 15mm wrench or socket
- 8mm wrench or socket
- Park Tool CCP-44
- #2 Philips screwdriver
- 3mm hex wrench
- 6mm hex wrench
- 8mm hex wrench
- Small pick (example)
- Finger dexterity
- Remove the battery from the bike
- Remove the rear wheel (instructions)
- Use the #2 Philips screwdriver to remove the taillight mount from the saddle rails, then the 8mm wrench to remove the light from the mount, and then unplug the light and set it aside
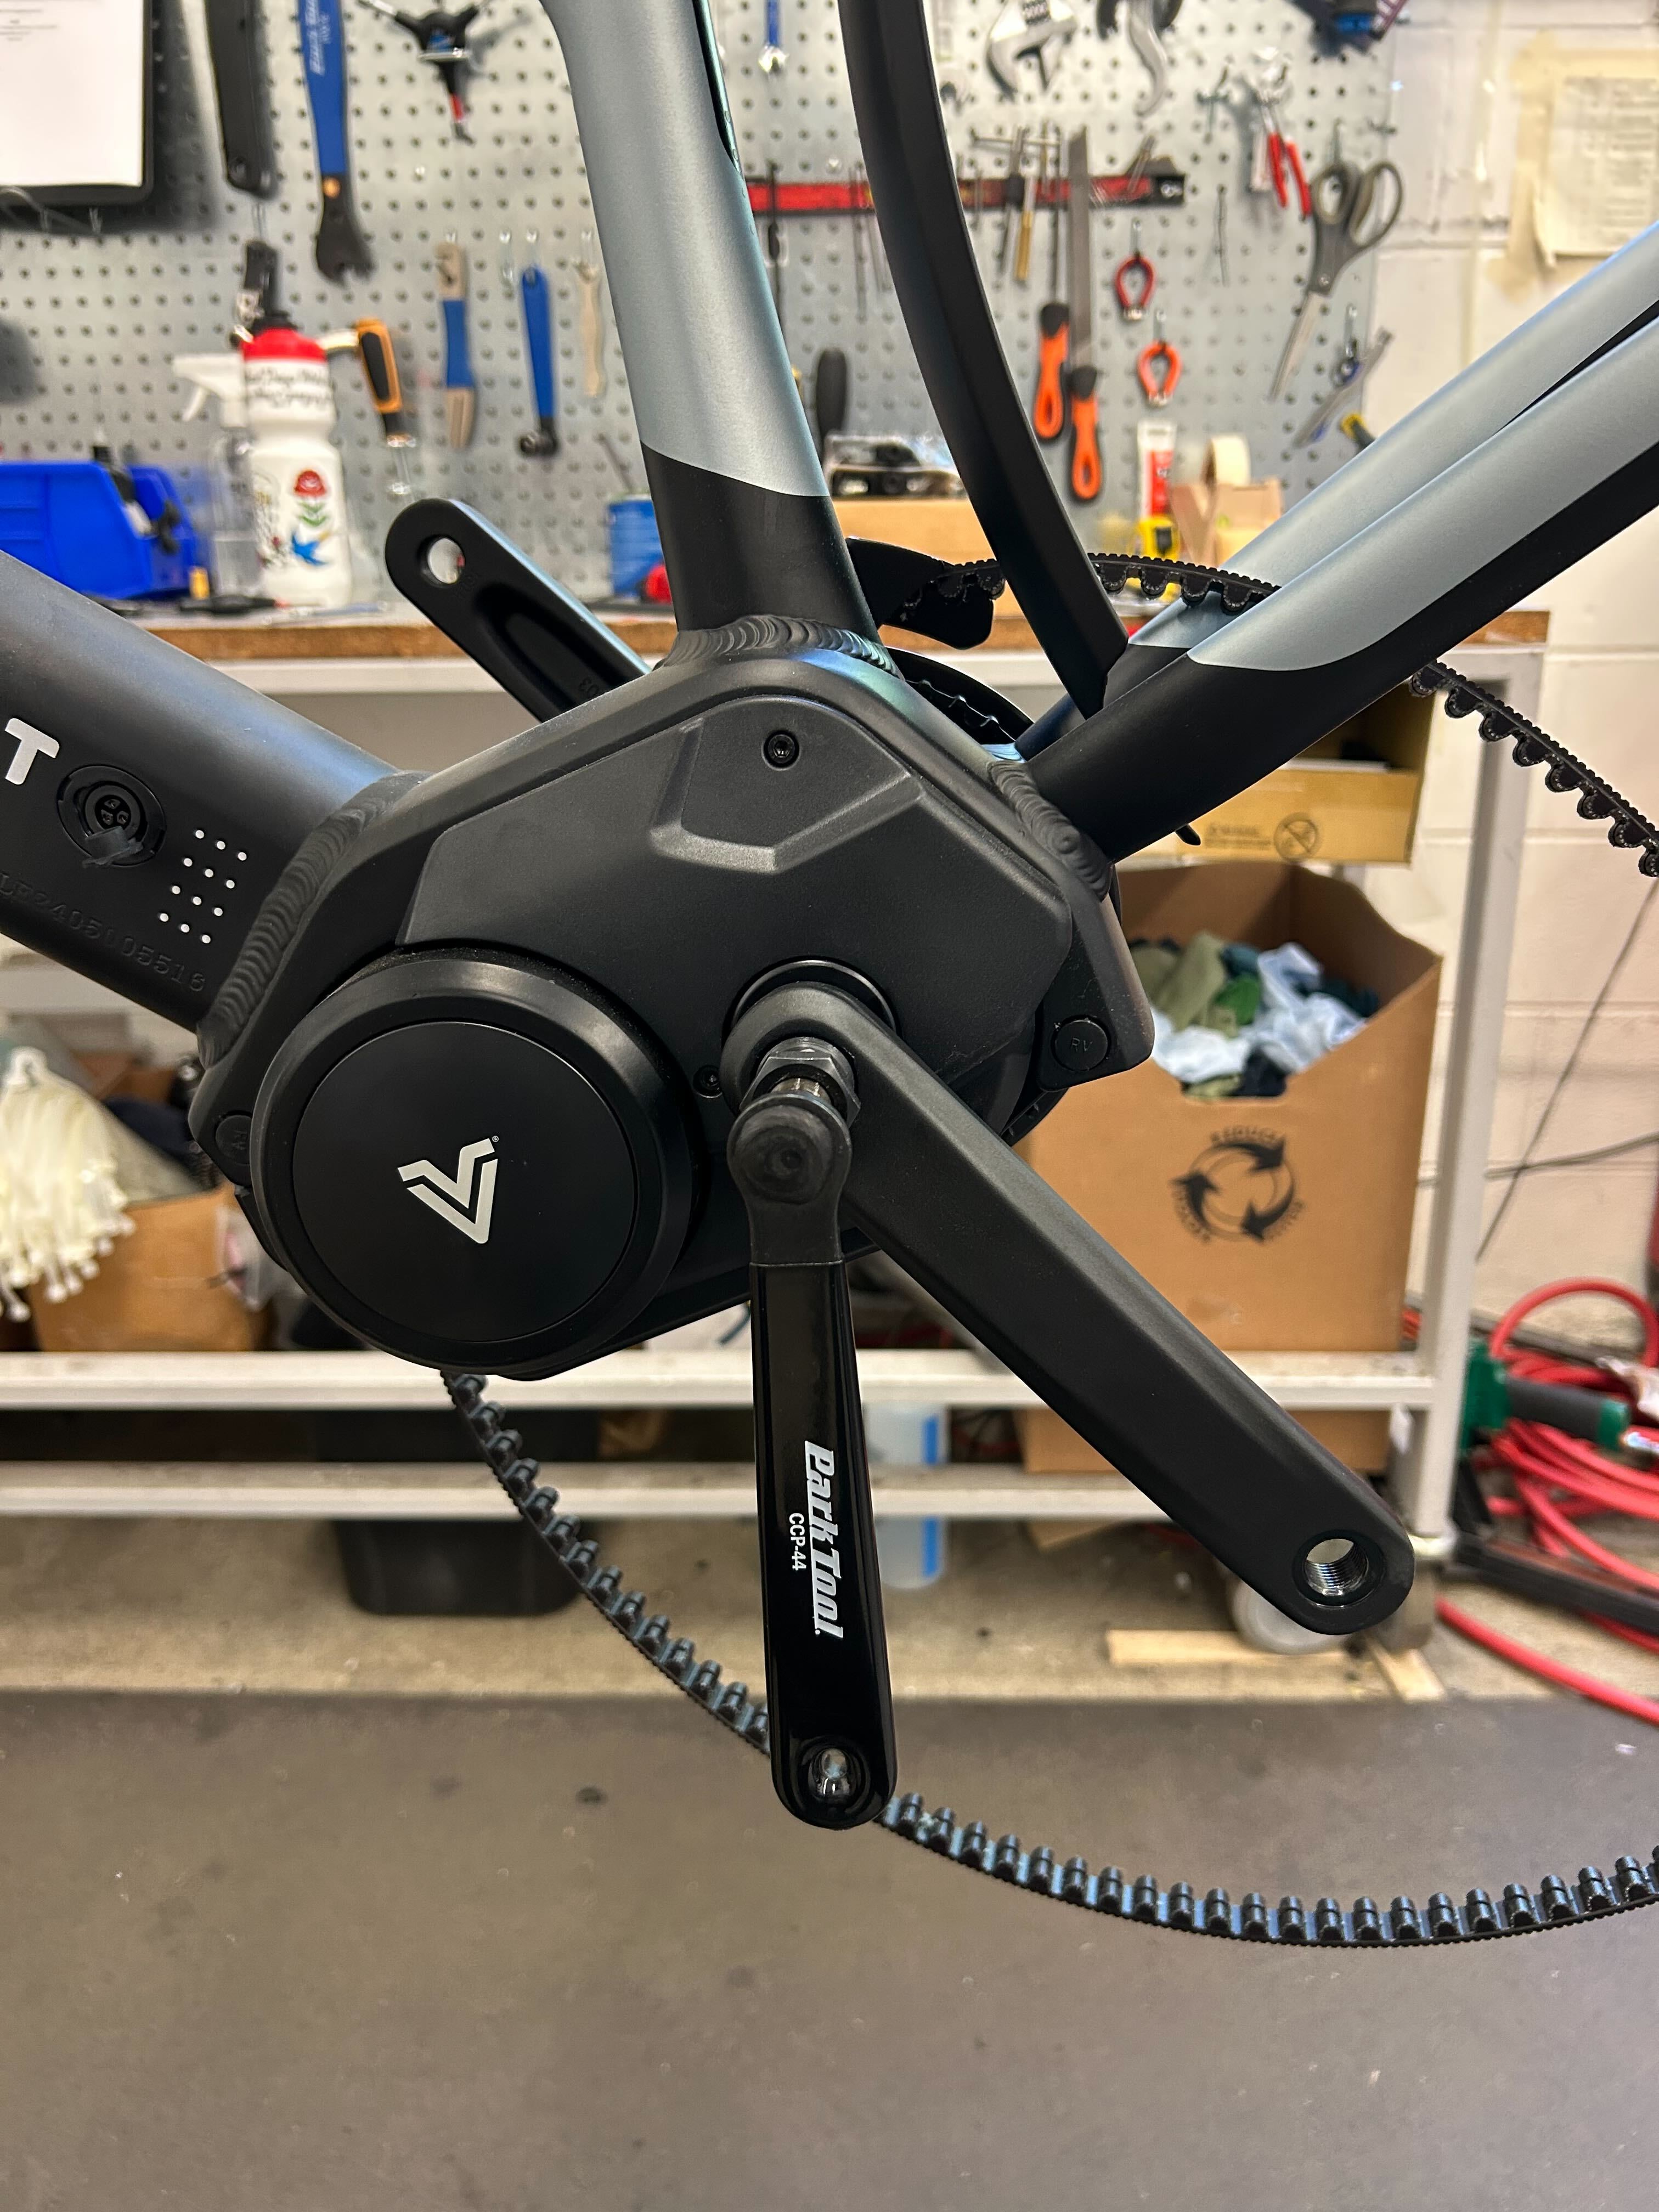
- Use the 8mm hex wrench to remove the non-drive side crank fixing bolt
- Use the CCP-44 to remove the non-drive side crank arm (how to use a crank puller)
- Use the 3mm hex wrench to remove the two motor cover bolts
- Use the pick or your fingers to remove all the rubber motor bolt caps, and set them aside
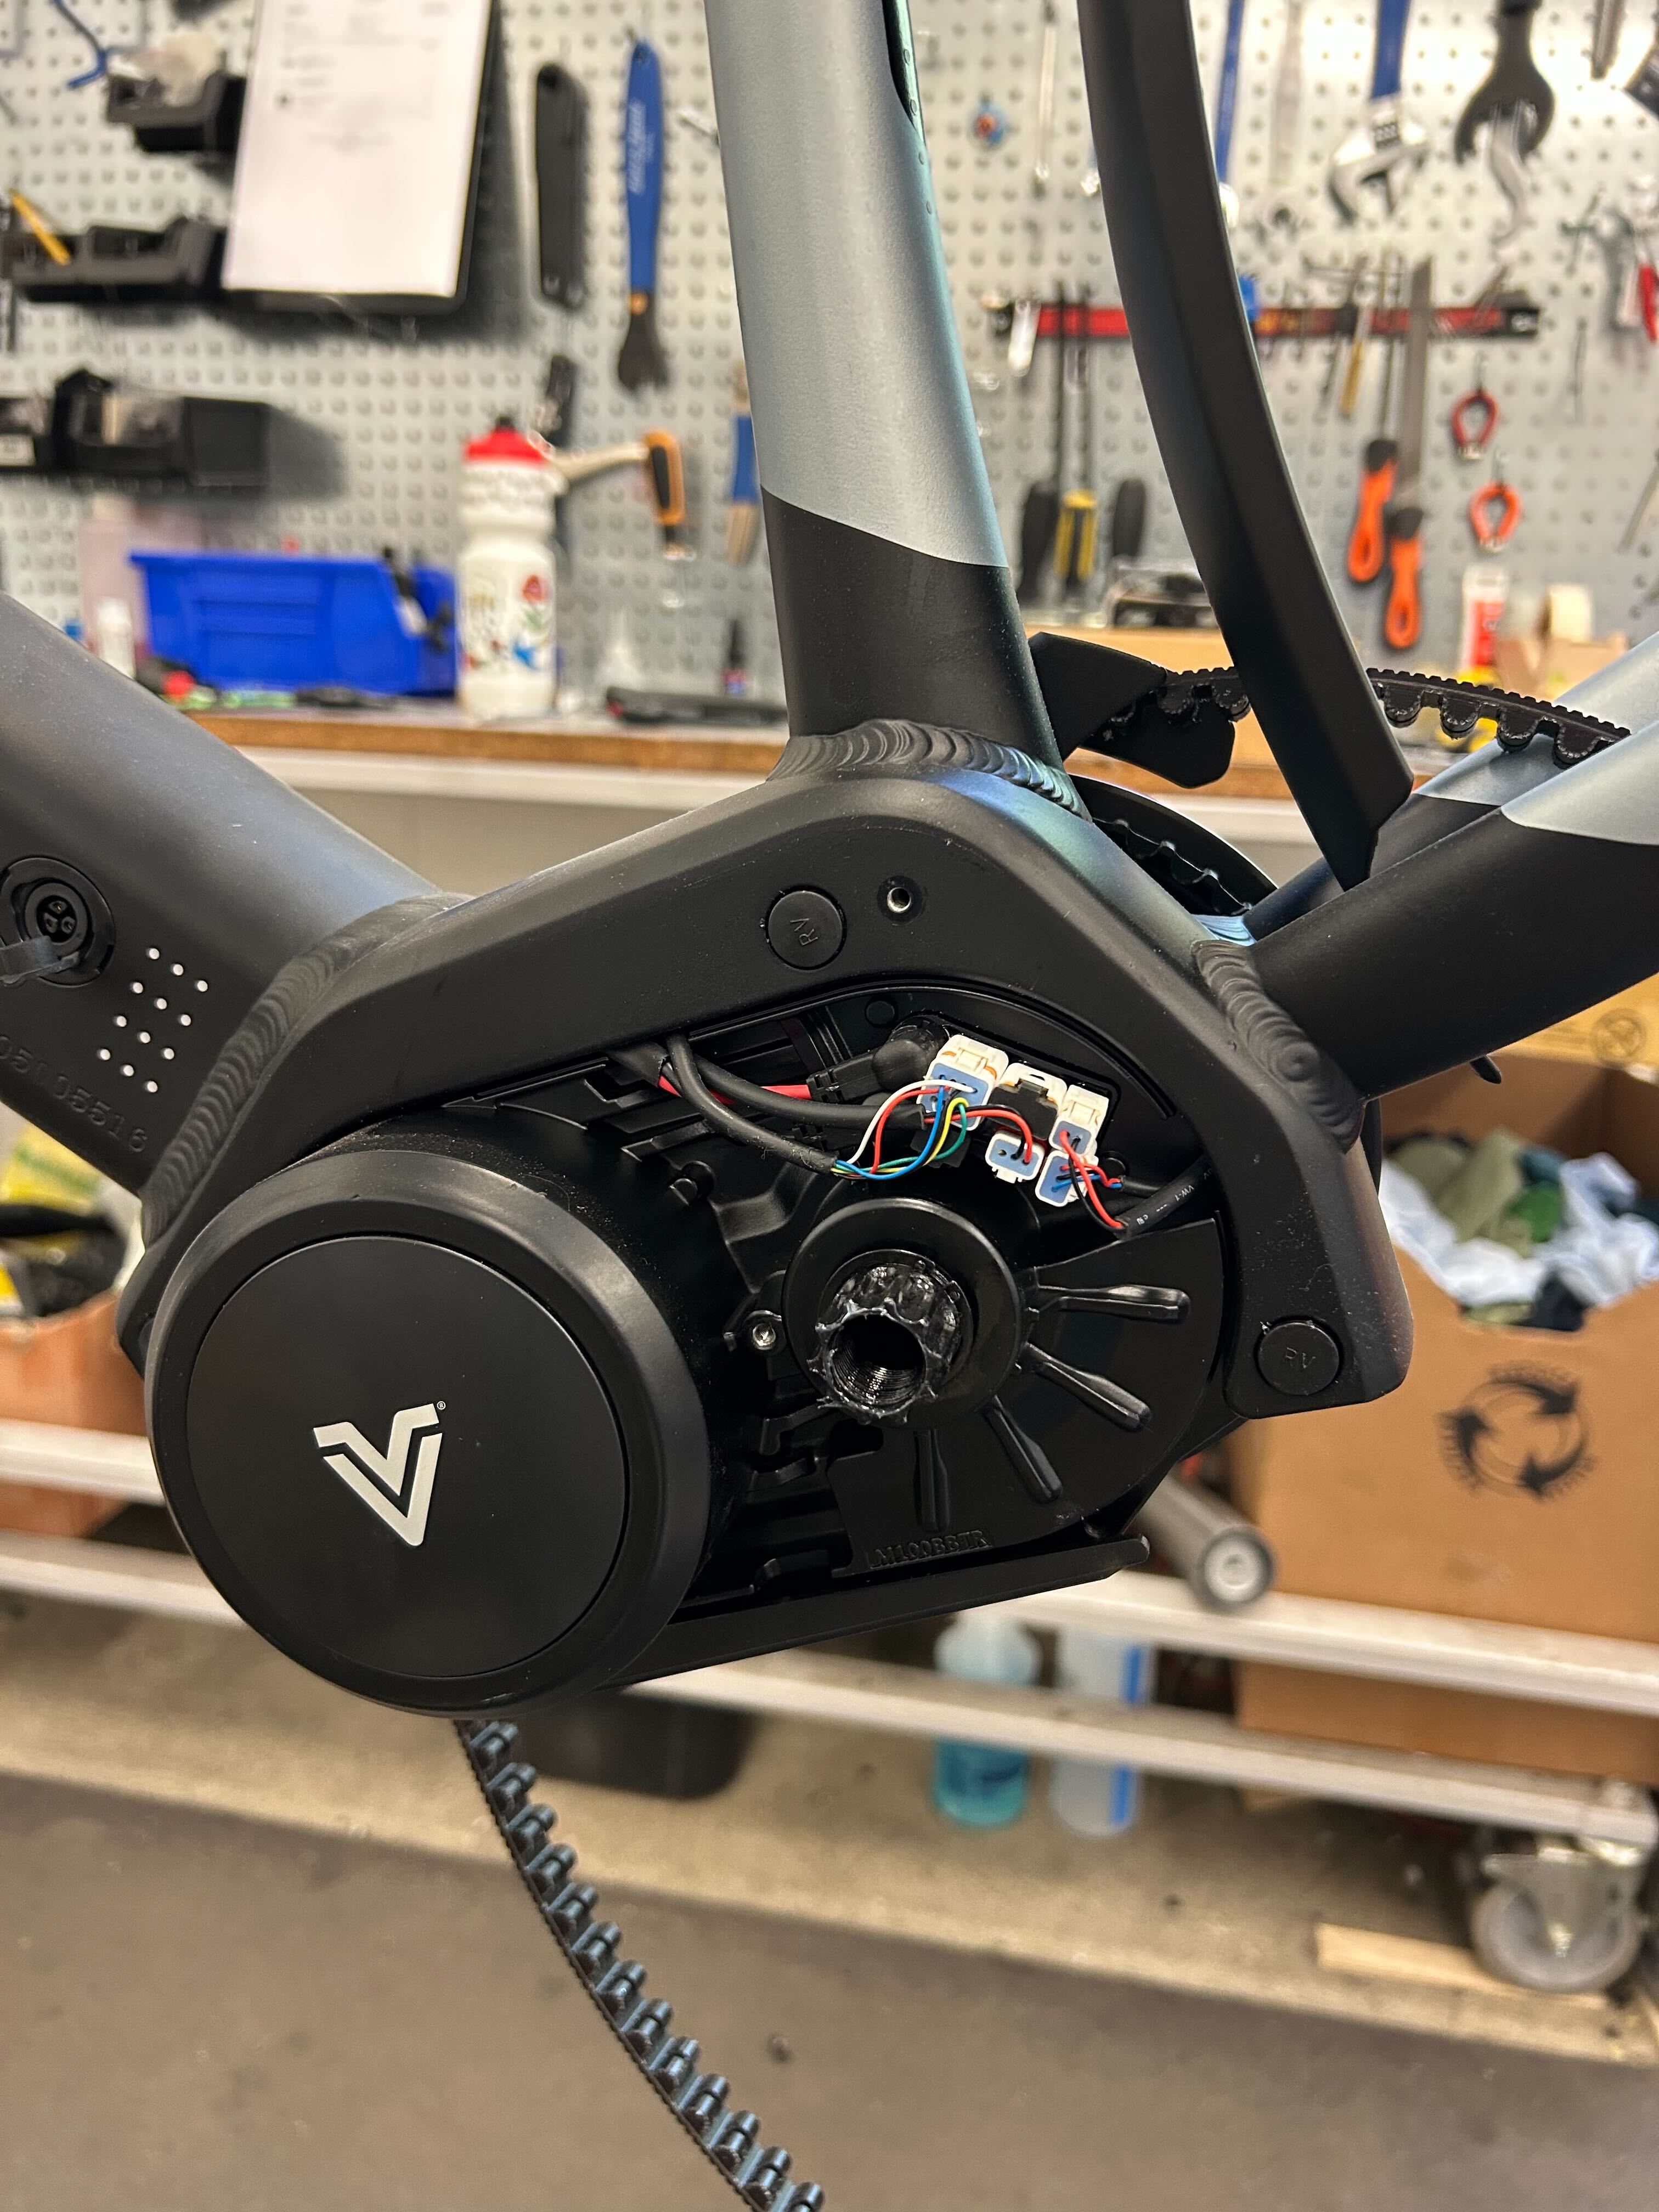
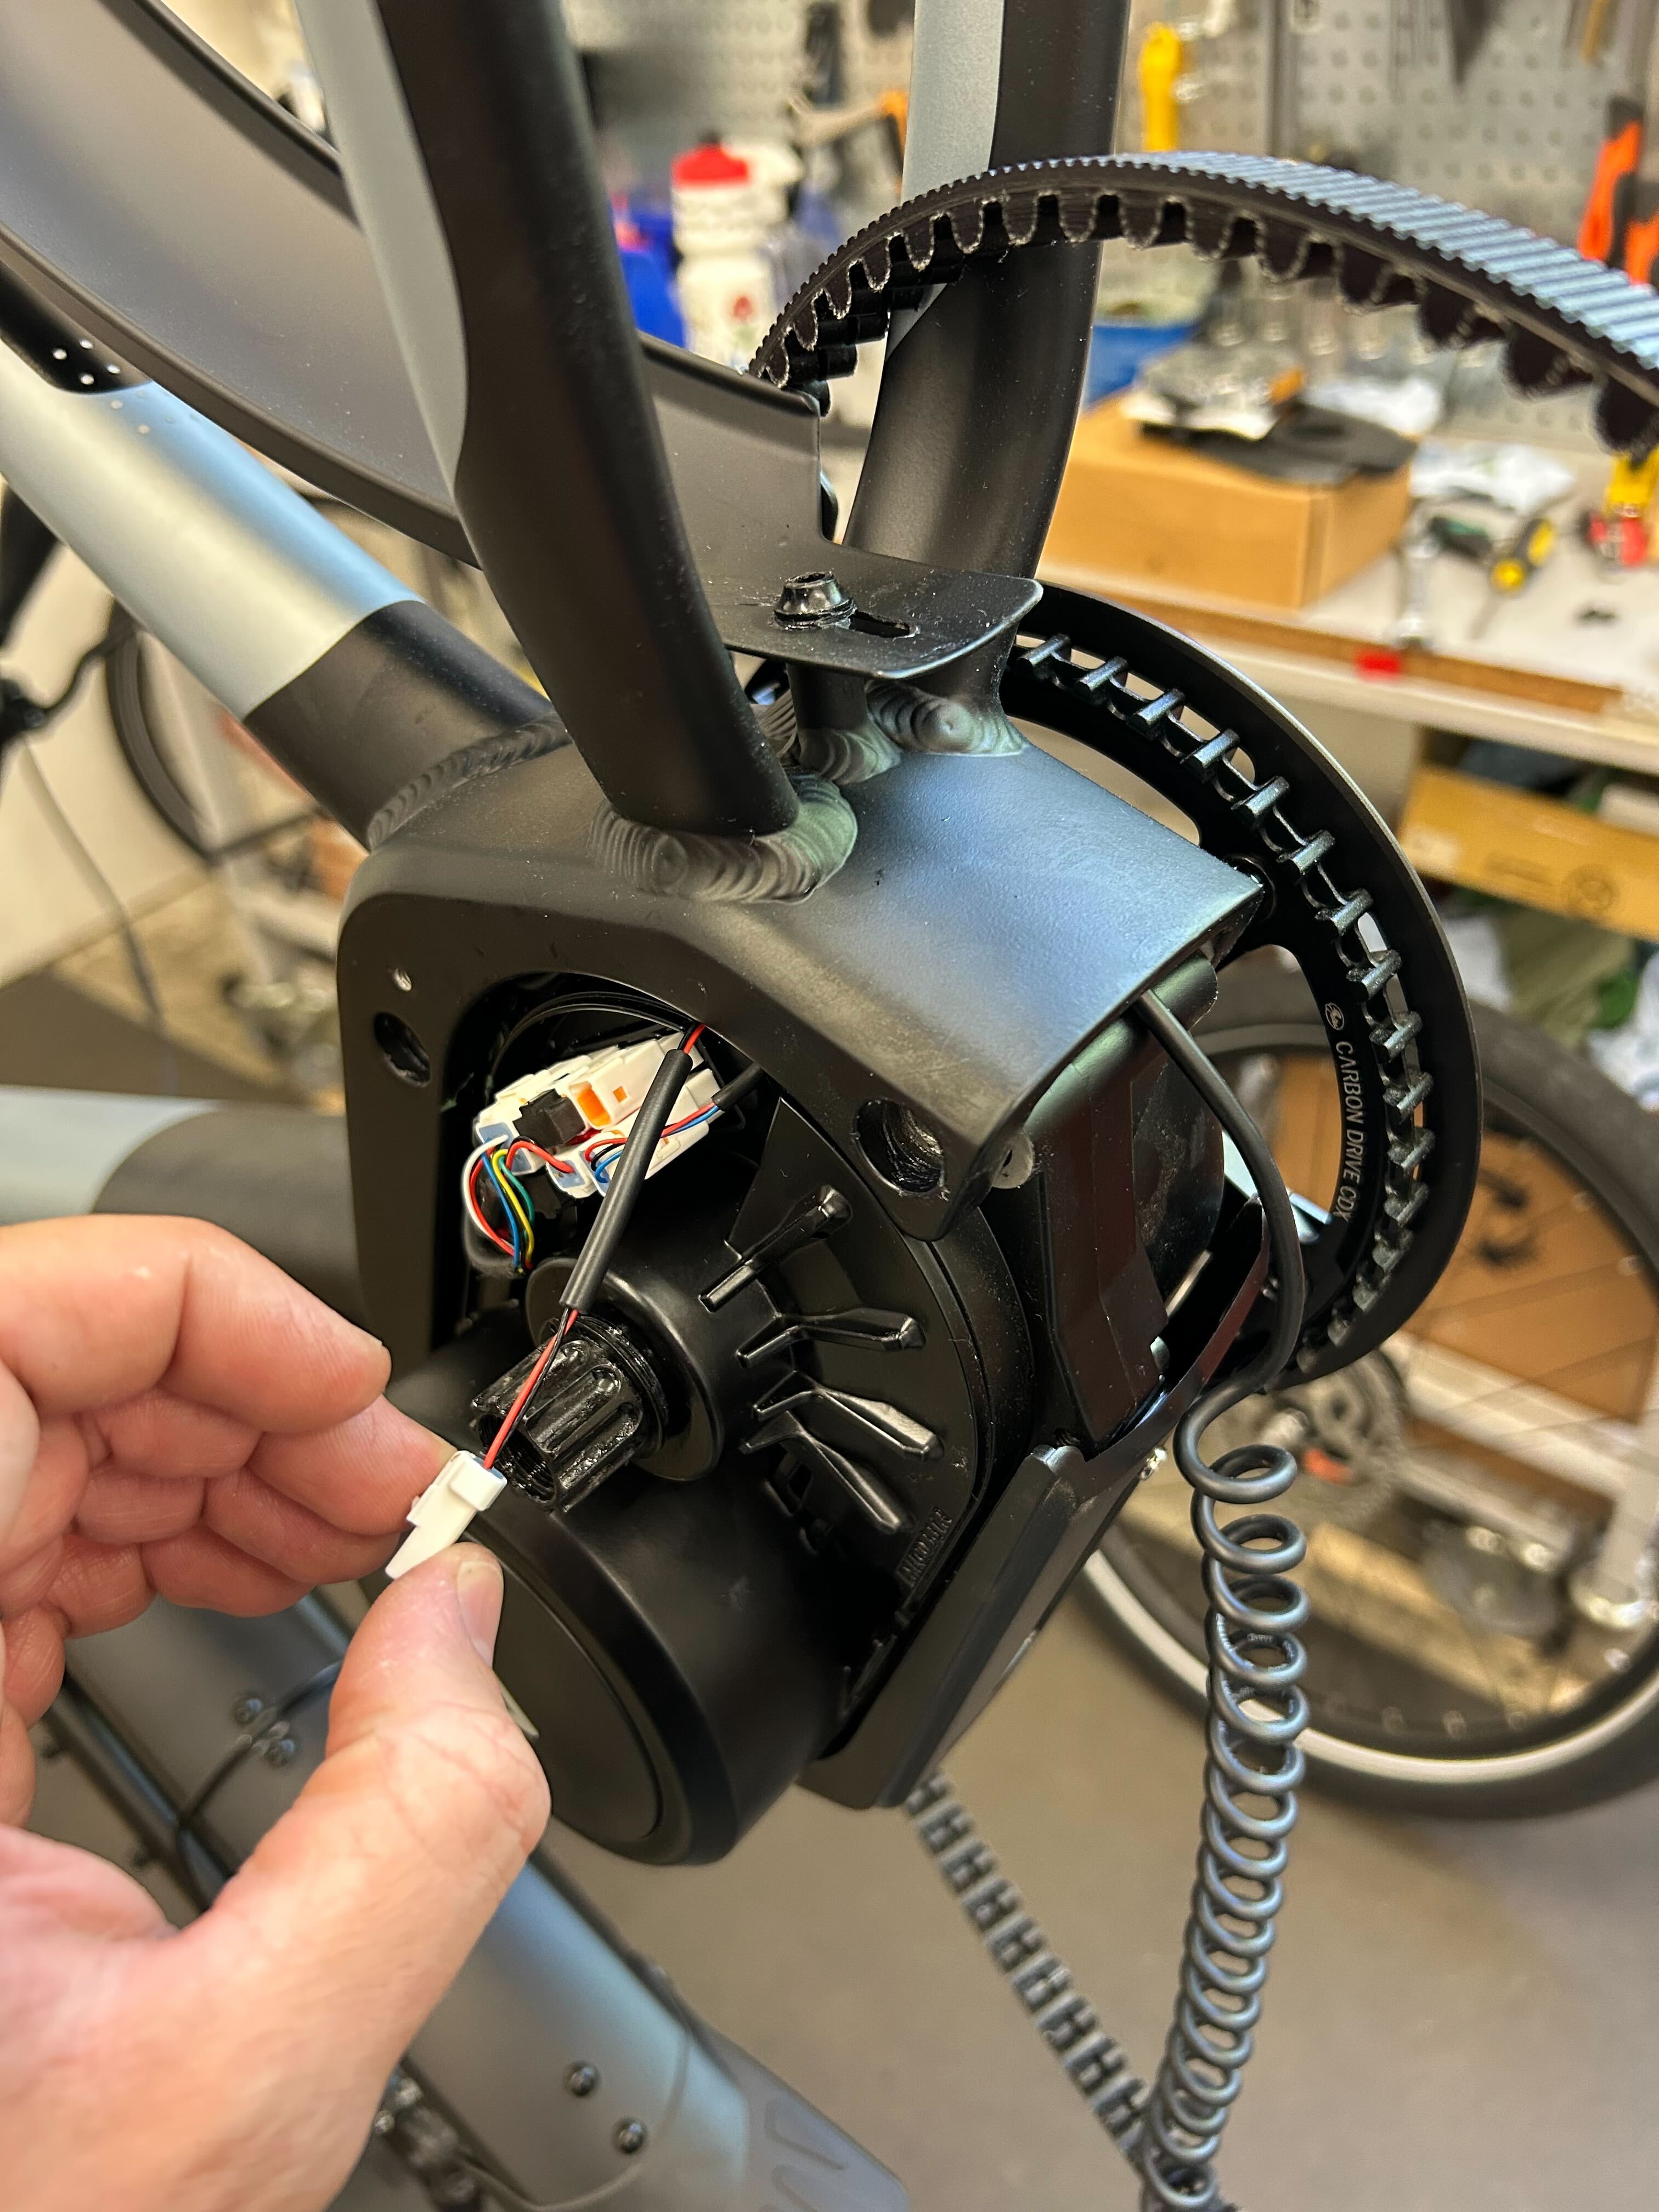
- Use the 6mm hex wrench to remove the front and middle motor bolts and to loosen the rear bolt. This partially drops the motor, allowing access to the necessary wires. Note: the bolts thread into captured nuts on the drive side.
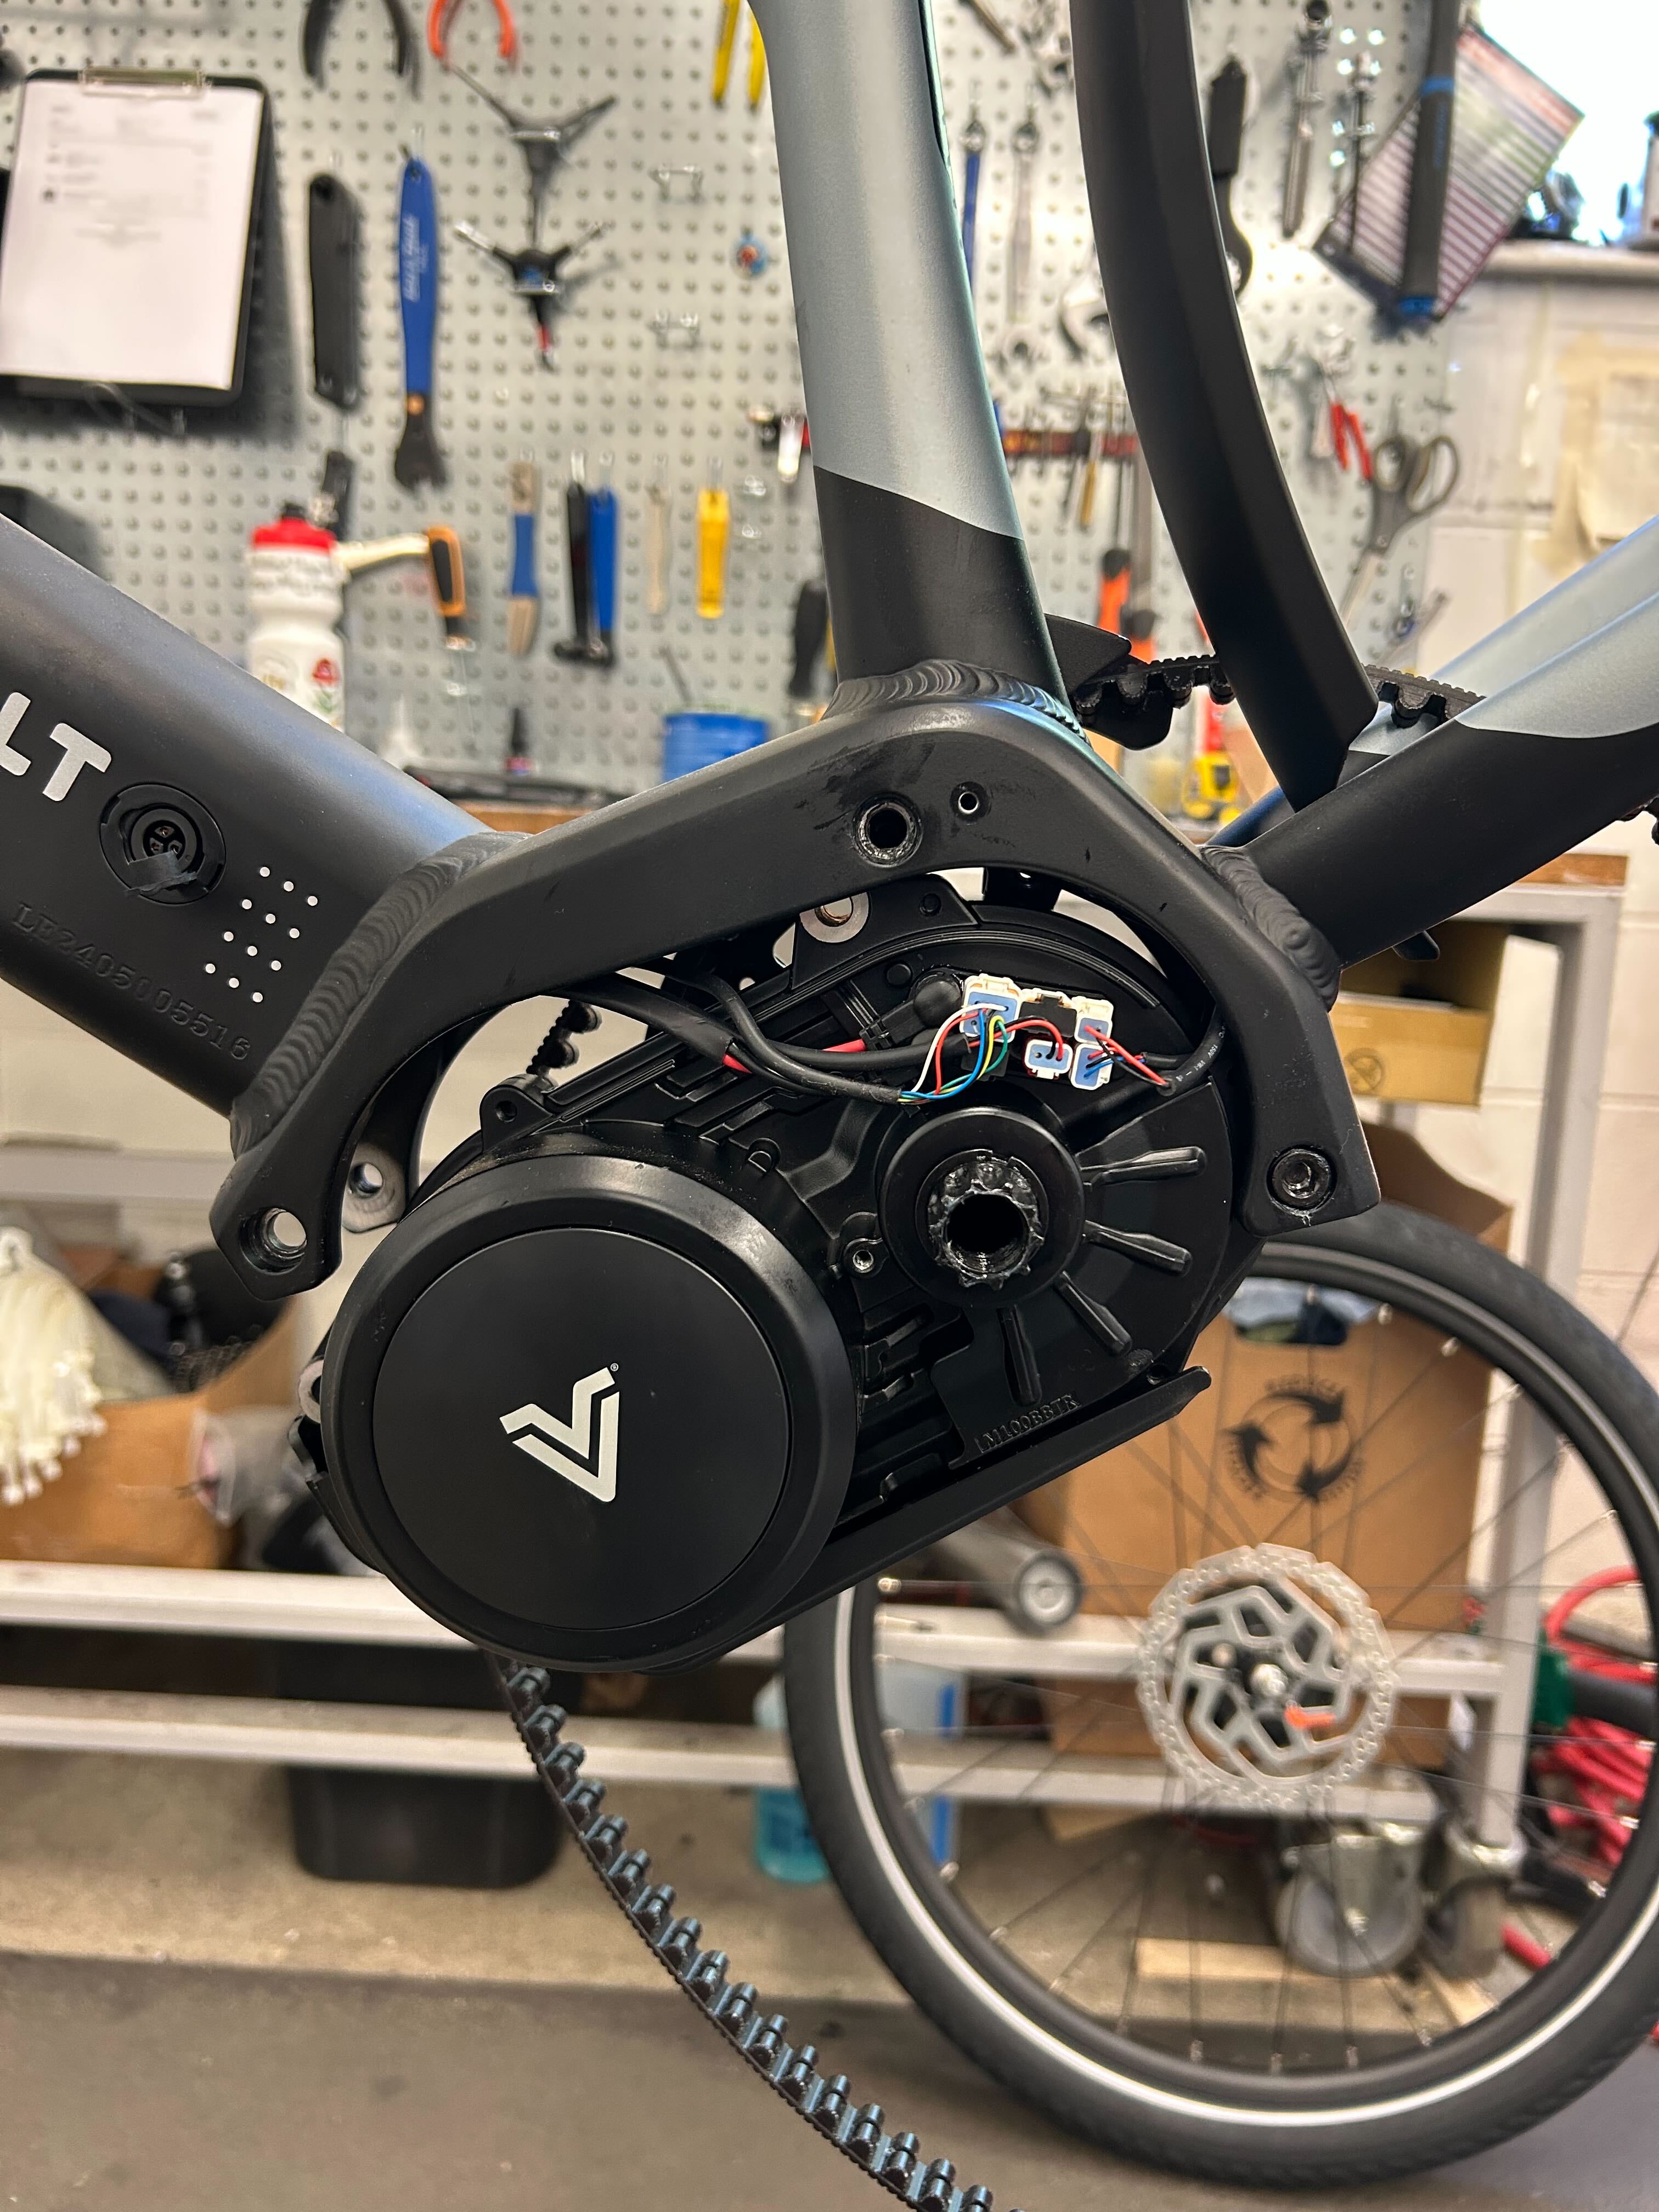
- The rear light plugs into the upper right socket. Use your pick to unplug the wire connector from the motor. Then pull it down through the seat tube. It's long and coiled!

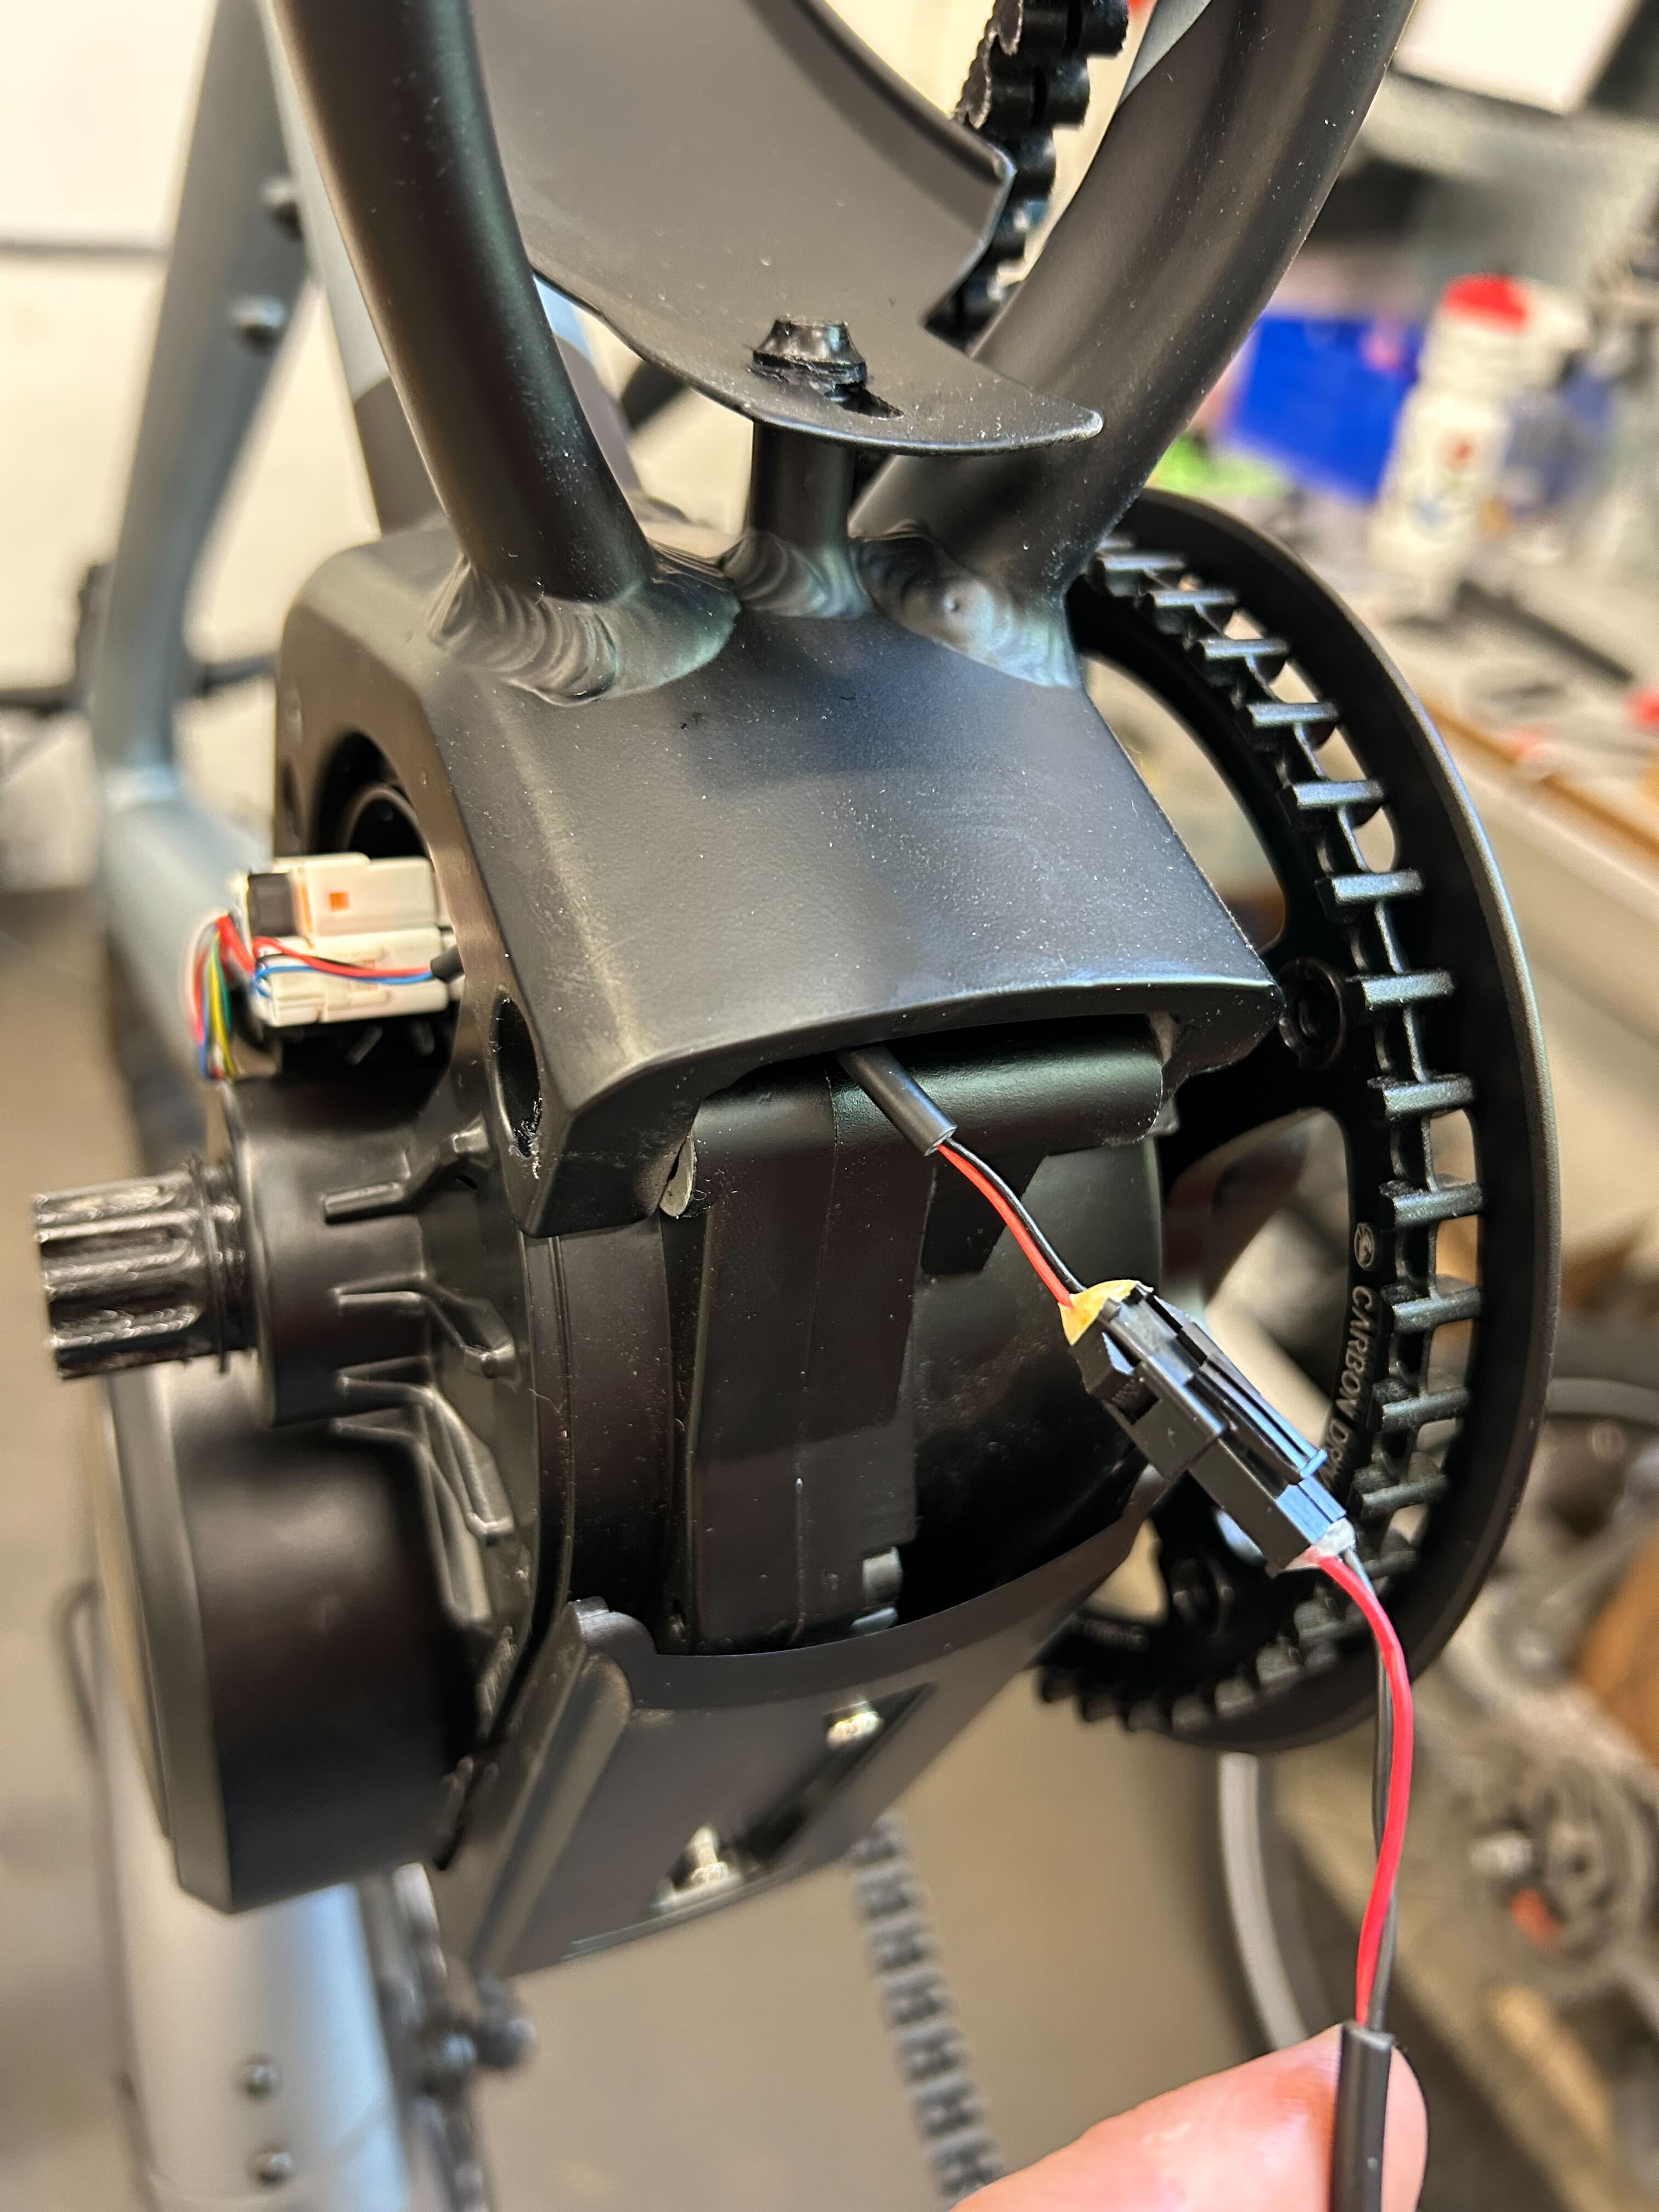
- Reinstall the front motor bolt, then loosen and remove the rear motor bolt to create a small gap at the back of the motor plate
 Ensure all wires run through the provided cutouts to avoid pinching during assembly.
 - Plug the light wire into the connector, then feed the connector up into the motor cavity from beneath the motor plate. Carefully grab the connector, guide it through the provided cutout, then plug it into the upper right socket on the motor.
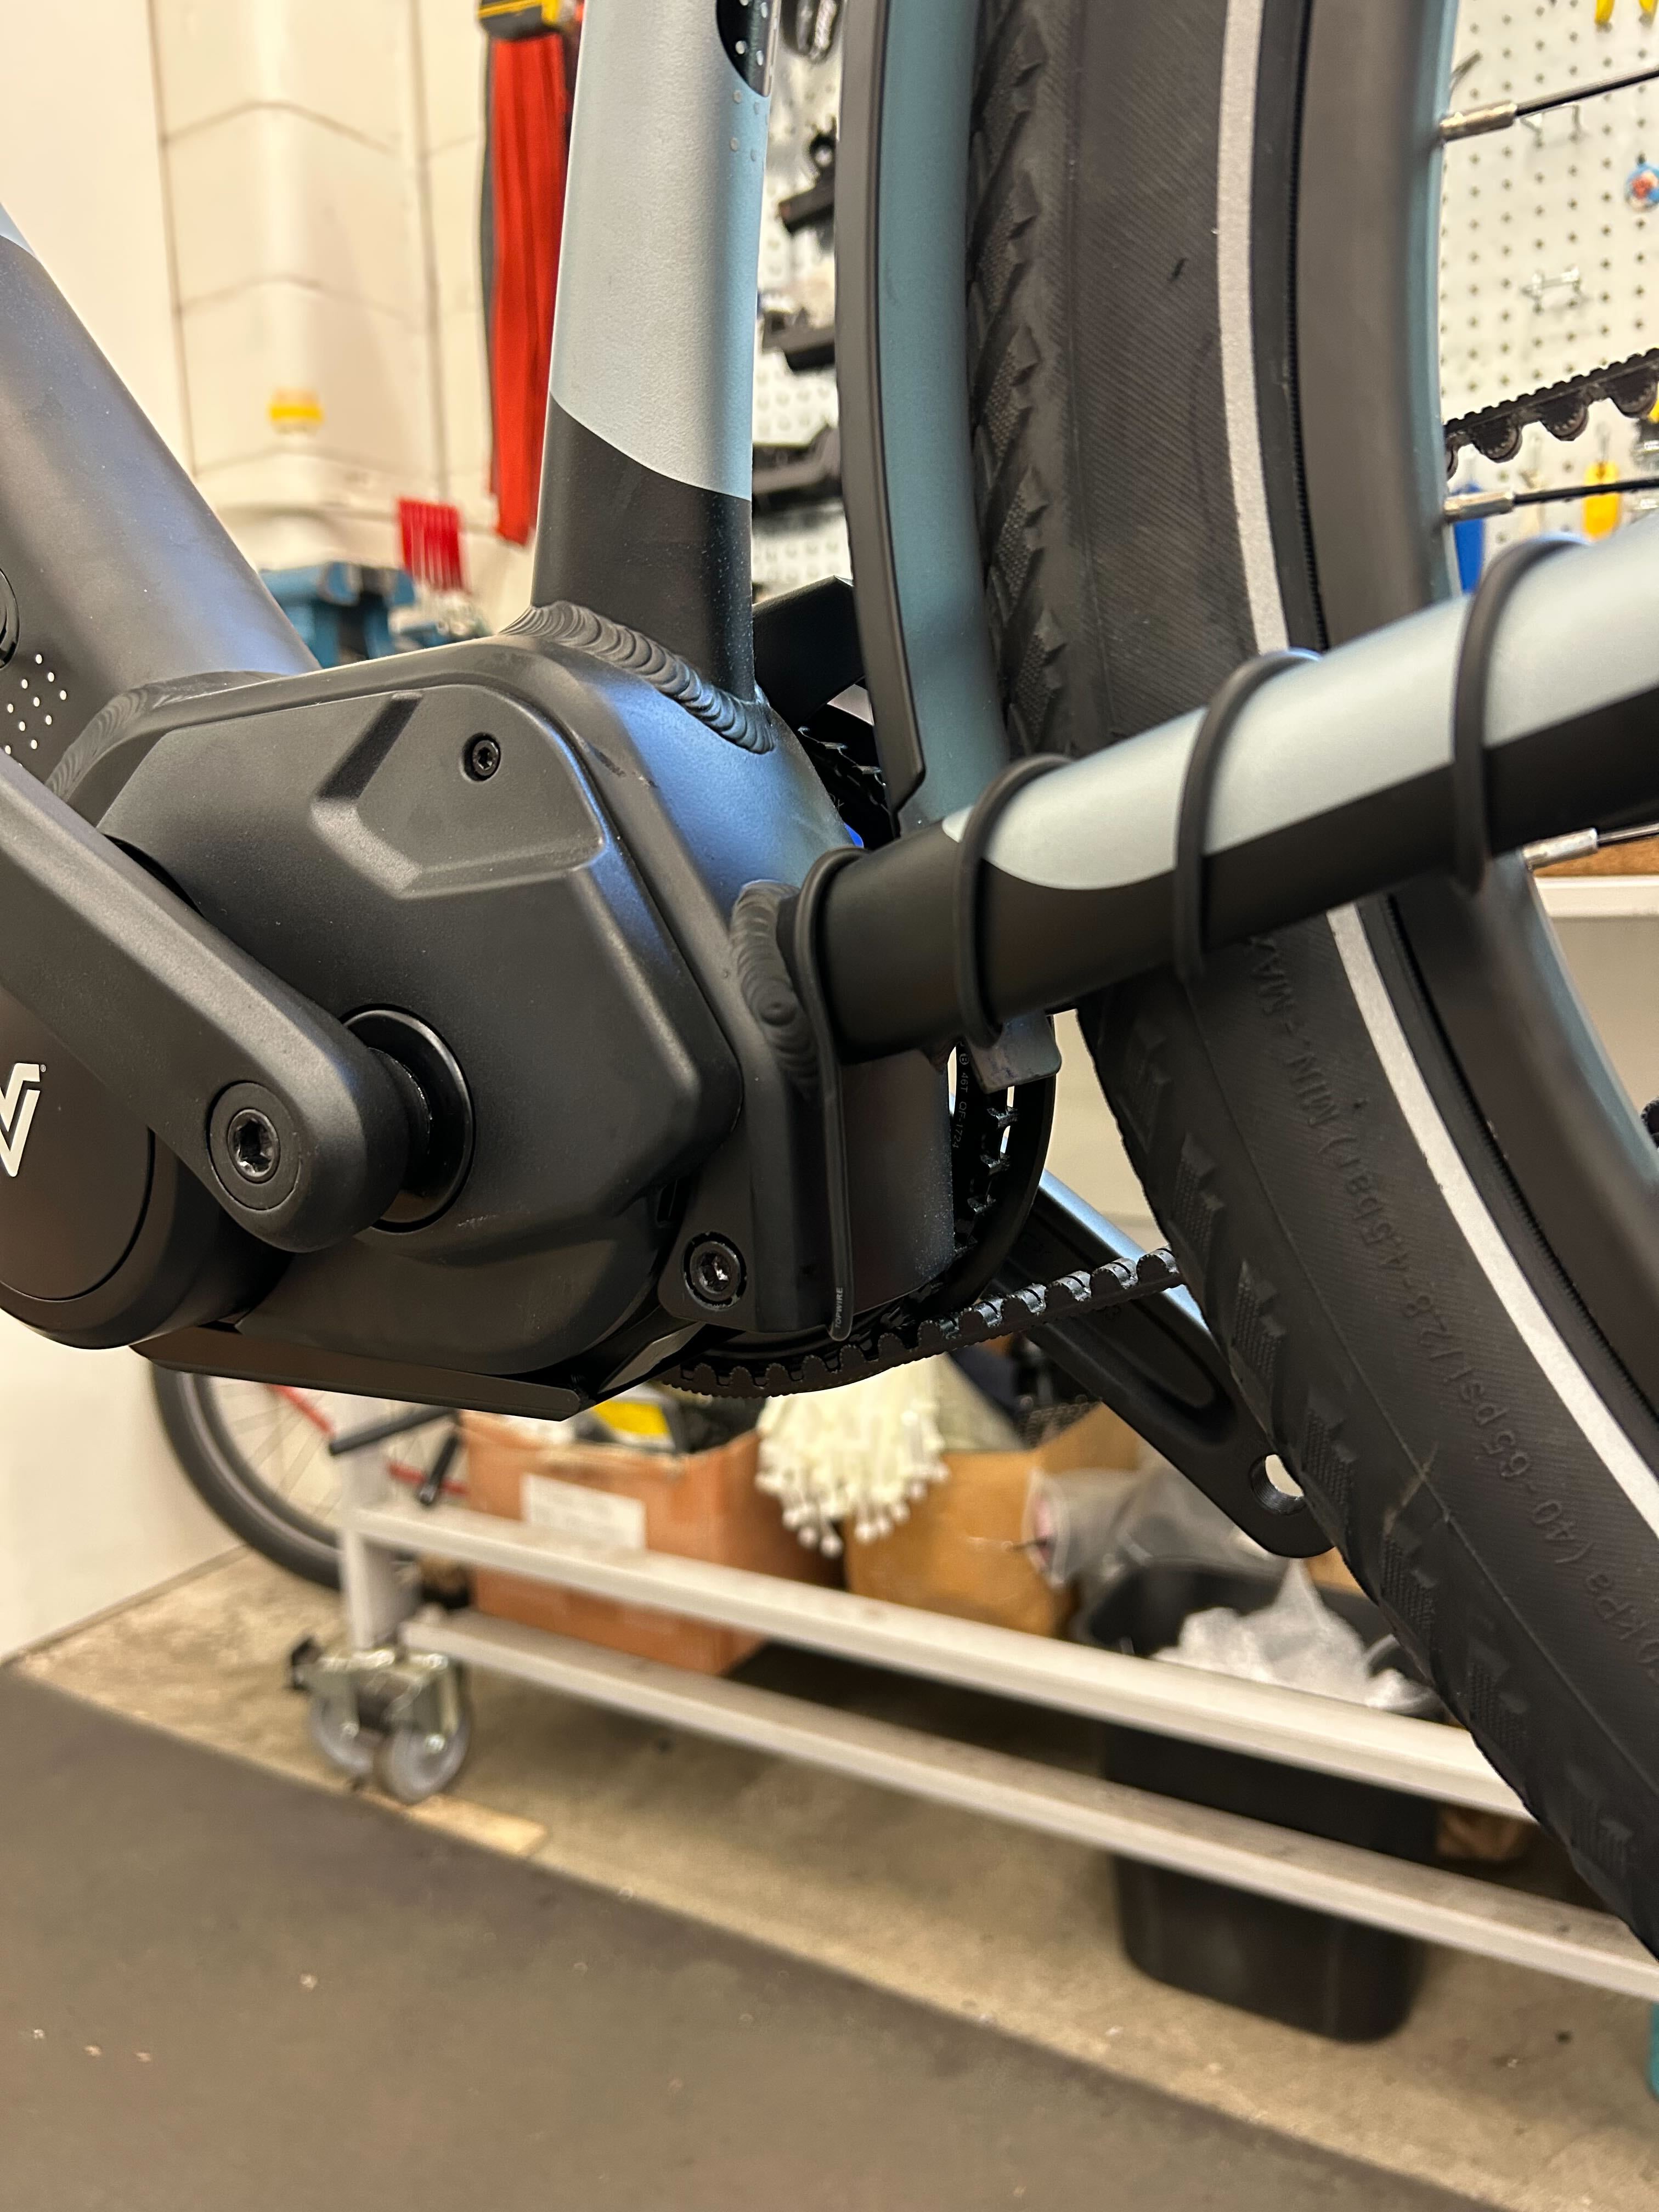
- Reinstall the motor bolts, ensuring that no wires are pinched; they should be routed through the small cutouts. Reinstall the motor cover, then install the crankarm and torque it to 40 Nm.
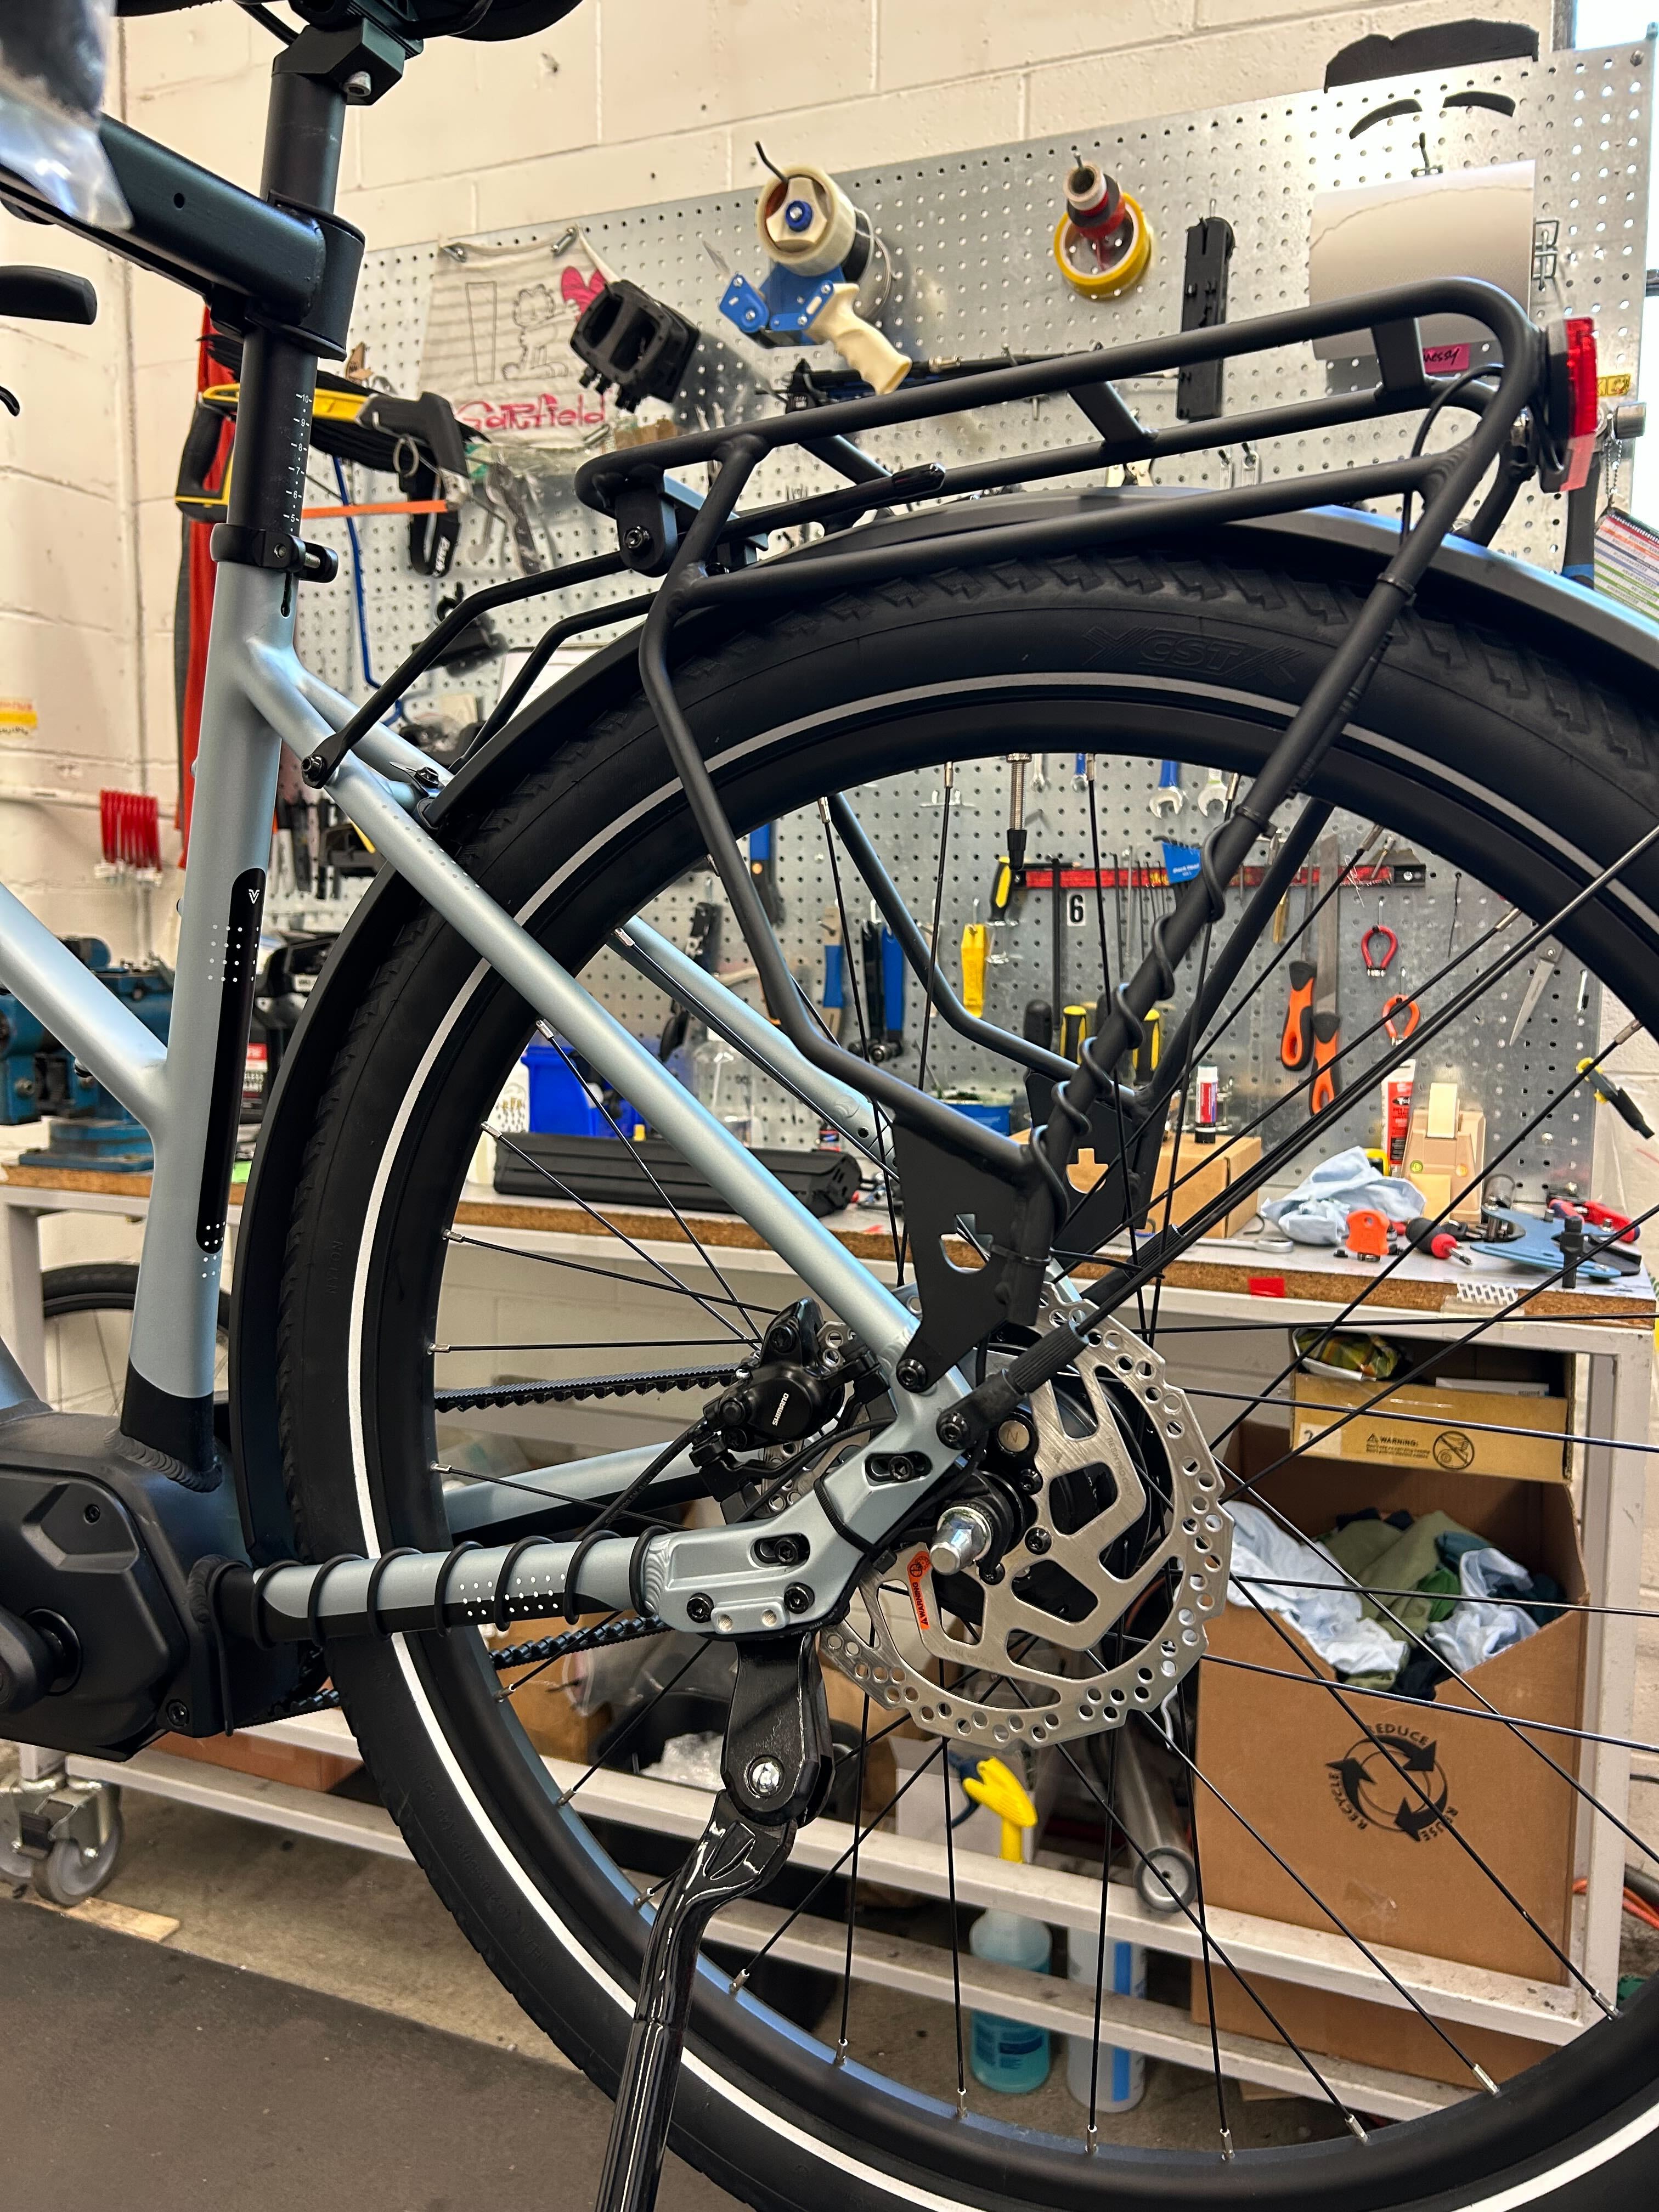
- We carefully wrap the light wire along the chain stay, route it between the frame and the brake caliper adapter, and then up the back support of the rear rack. However, you do you! If you have a different routing in mind, we say, "go for it!"
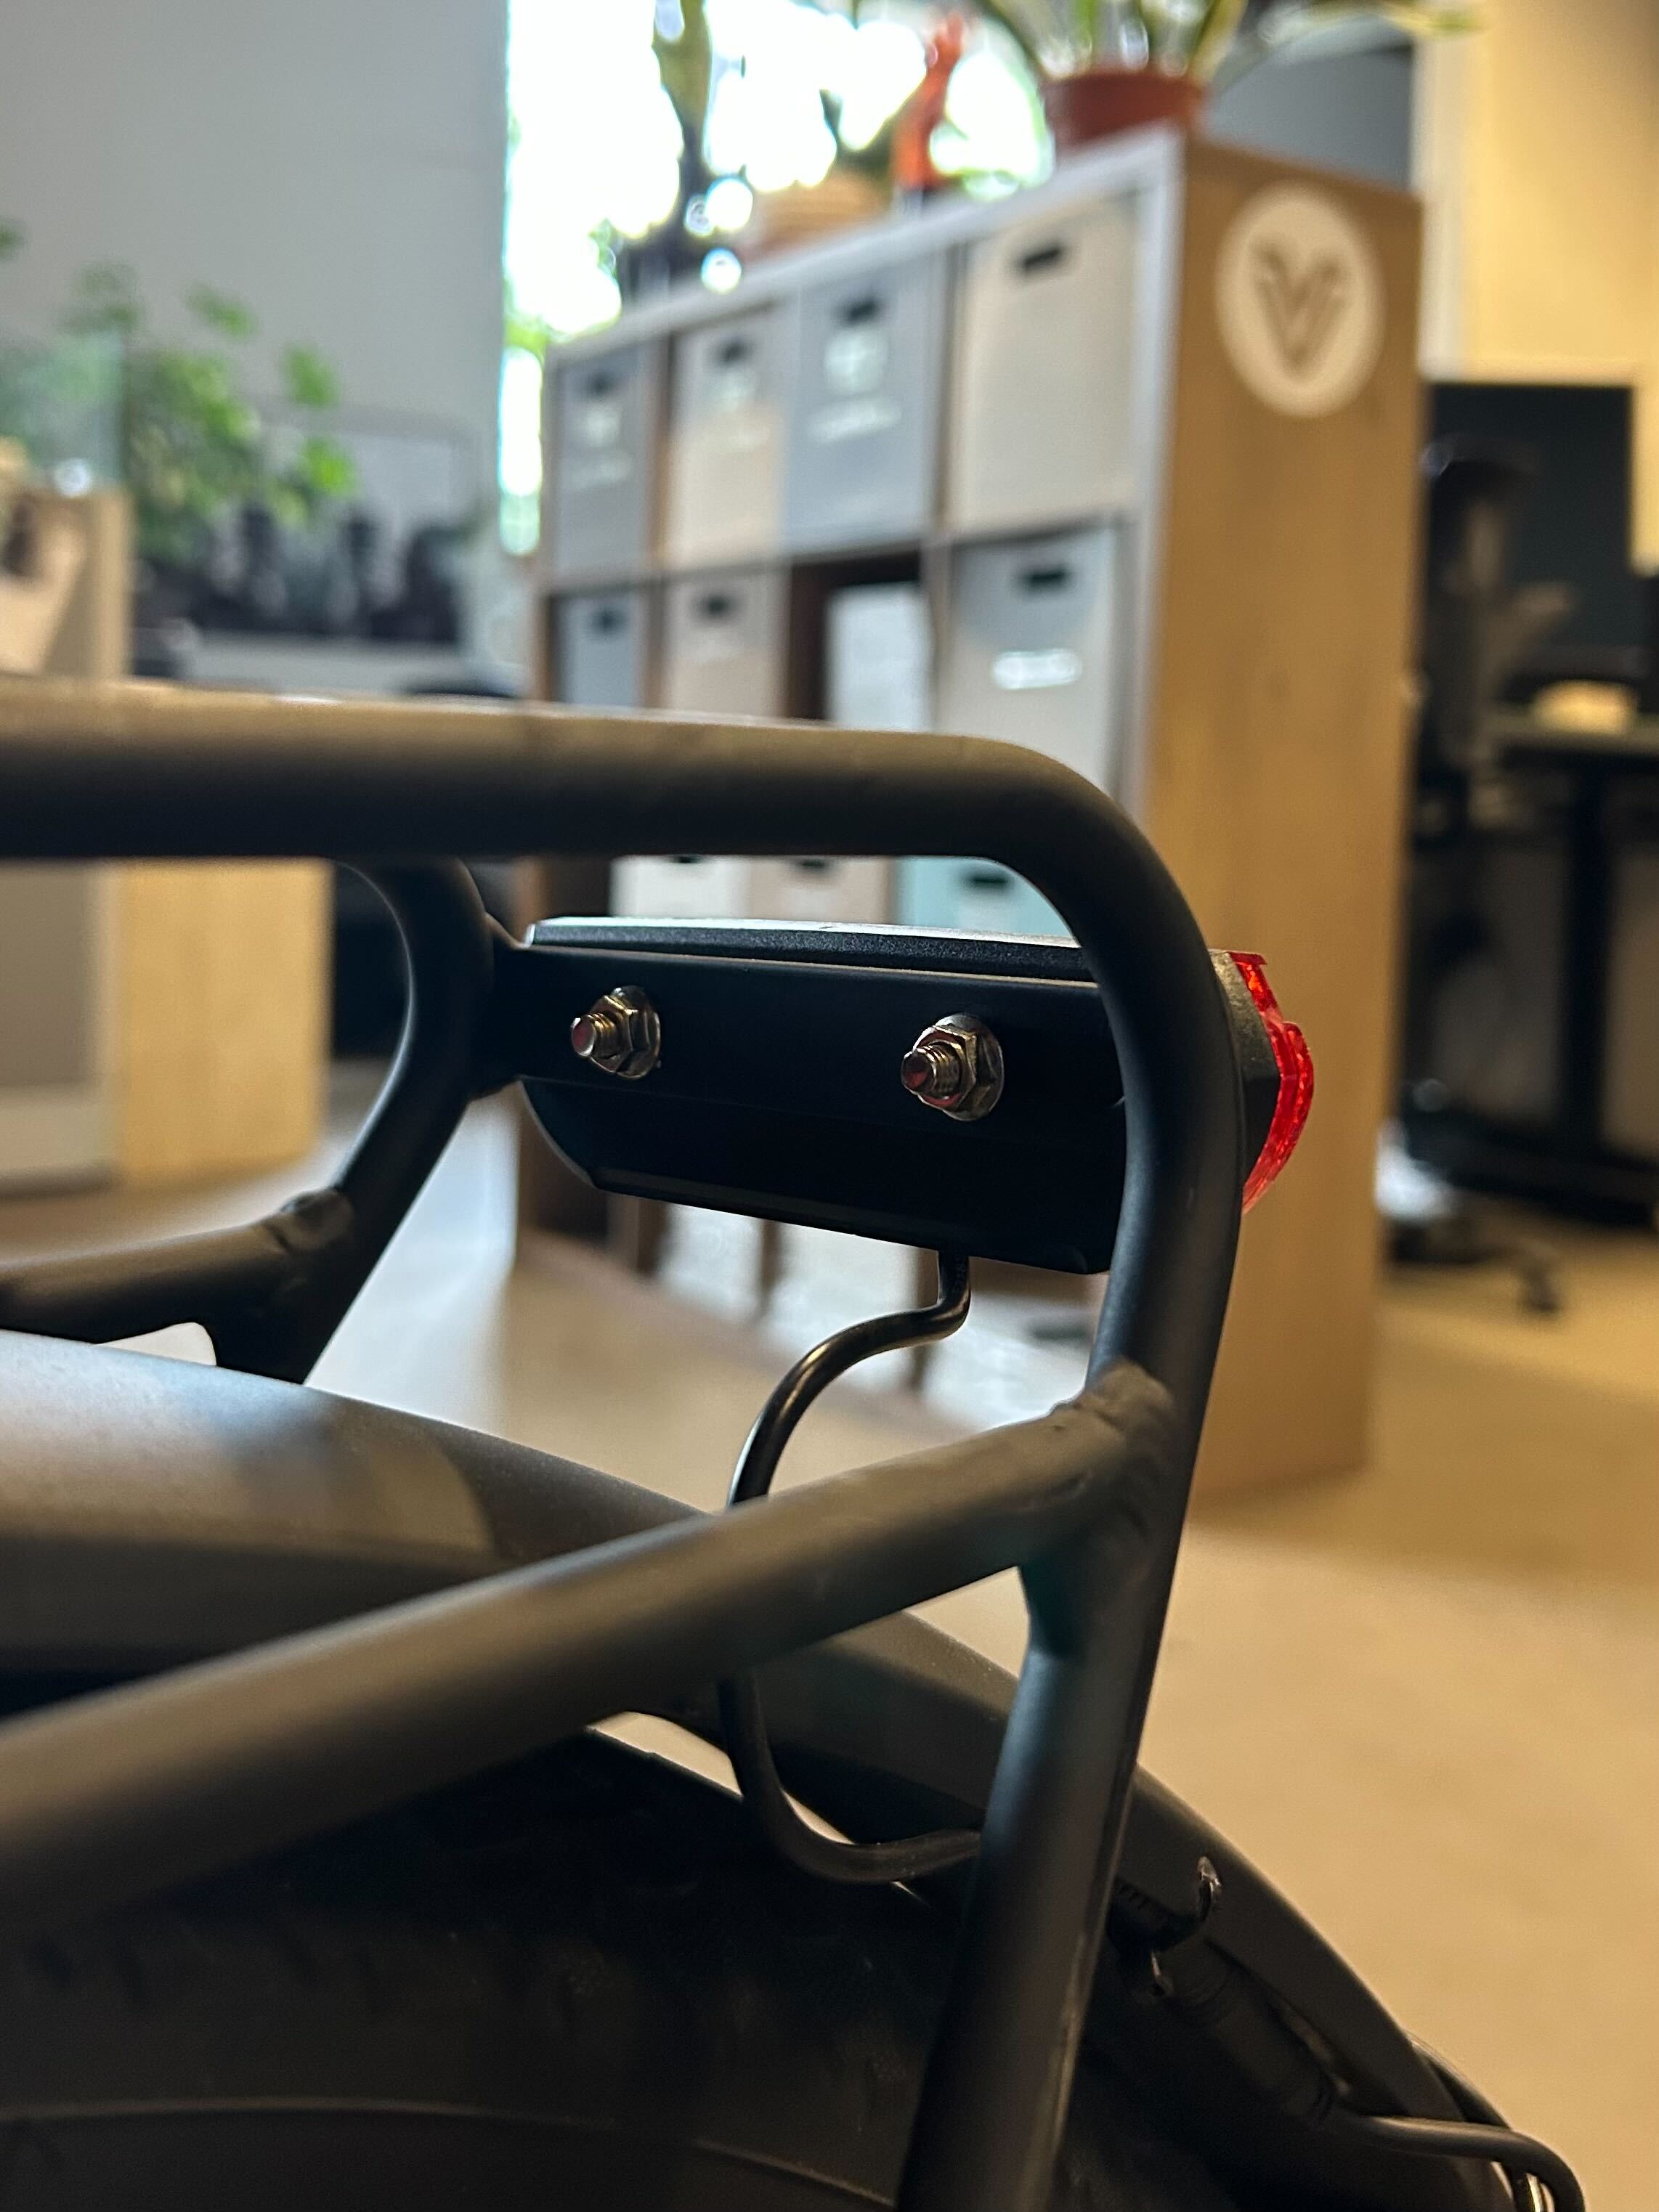
- Using the 8 mm box wrench, install the rear light onto the back of the rack and plug it in.
- Install the rear wheel, plug in the battery, and test the light!