Vvolt Aluminum Fender Installation TipsUpdated 5 months ago
Ah, full coverage fenders! They're a true game-changer in increasing the everyday utility of your ebike. They help us avoid the dreaded Willamette Valley Racing Stripe (read: a muddy back) while riding through the rain here in Portland because showing up wet and muddy ain't cool! They also help keep your drivetrain nice and dry, arguably more critical depending on how you value yourself.
If you're a DIY person, this guide will help your installation with tips, tricks, and measurements! Heads up: depending on which bike you're installing them on, you may need custom fitting to achieve a good fender line. The fender line describes how the fender aligns with the curvature of the tire. Essentially, the space between the fender and the tire should remain consistent along the entire length of the fender. While it might not significantly impact performance, it dramatically influences the bike's overall look. People might judge you if your fender line is wonky. I'M JUST SAYIN'
A 10mm gap should exist between your tire's top and the fender blade's bottom. Too little clearance and foreign debris can lodge up there, yucking your yum! According to the purists, too much gap looks silly.
Compatibility
This fender kit is "universal" for most 26"/27.5" wheel bikes with tires no greater than 2.4" wide and includes a standard set of hardware to make installation as easy as possible. They were explicitly designed for second-generation Vvolt ebikes and work on many others!
We designed our fenders to be mounted at standard locations on most bicycles. The front fender attaches to the fork crown and fork legs, while the rear fender attaches to the seat bridge, chainstay bridge, and eyelets at the rear dropout.
Included Hardware:
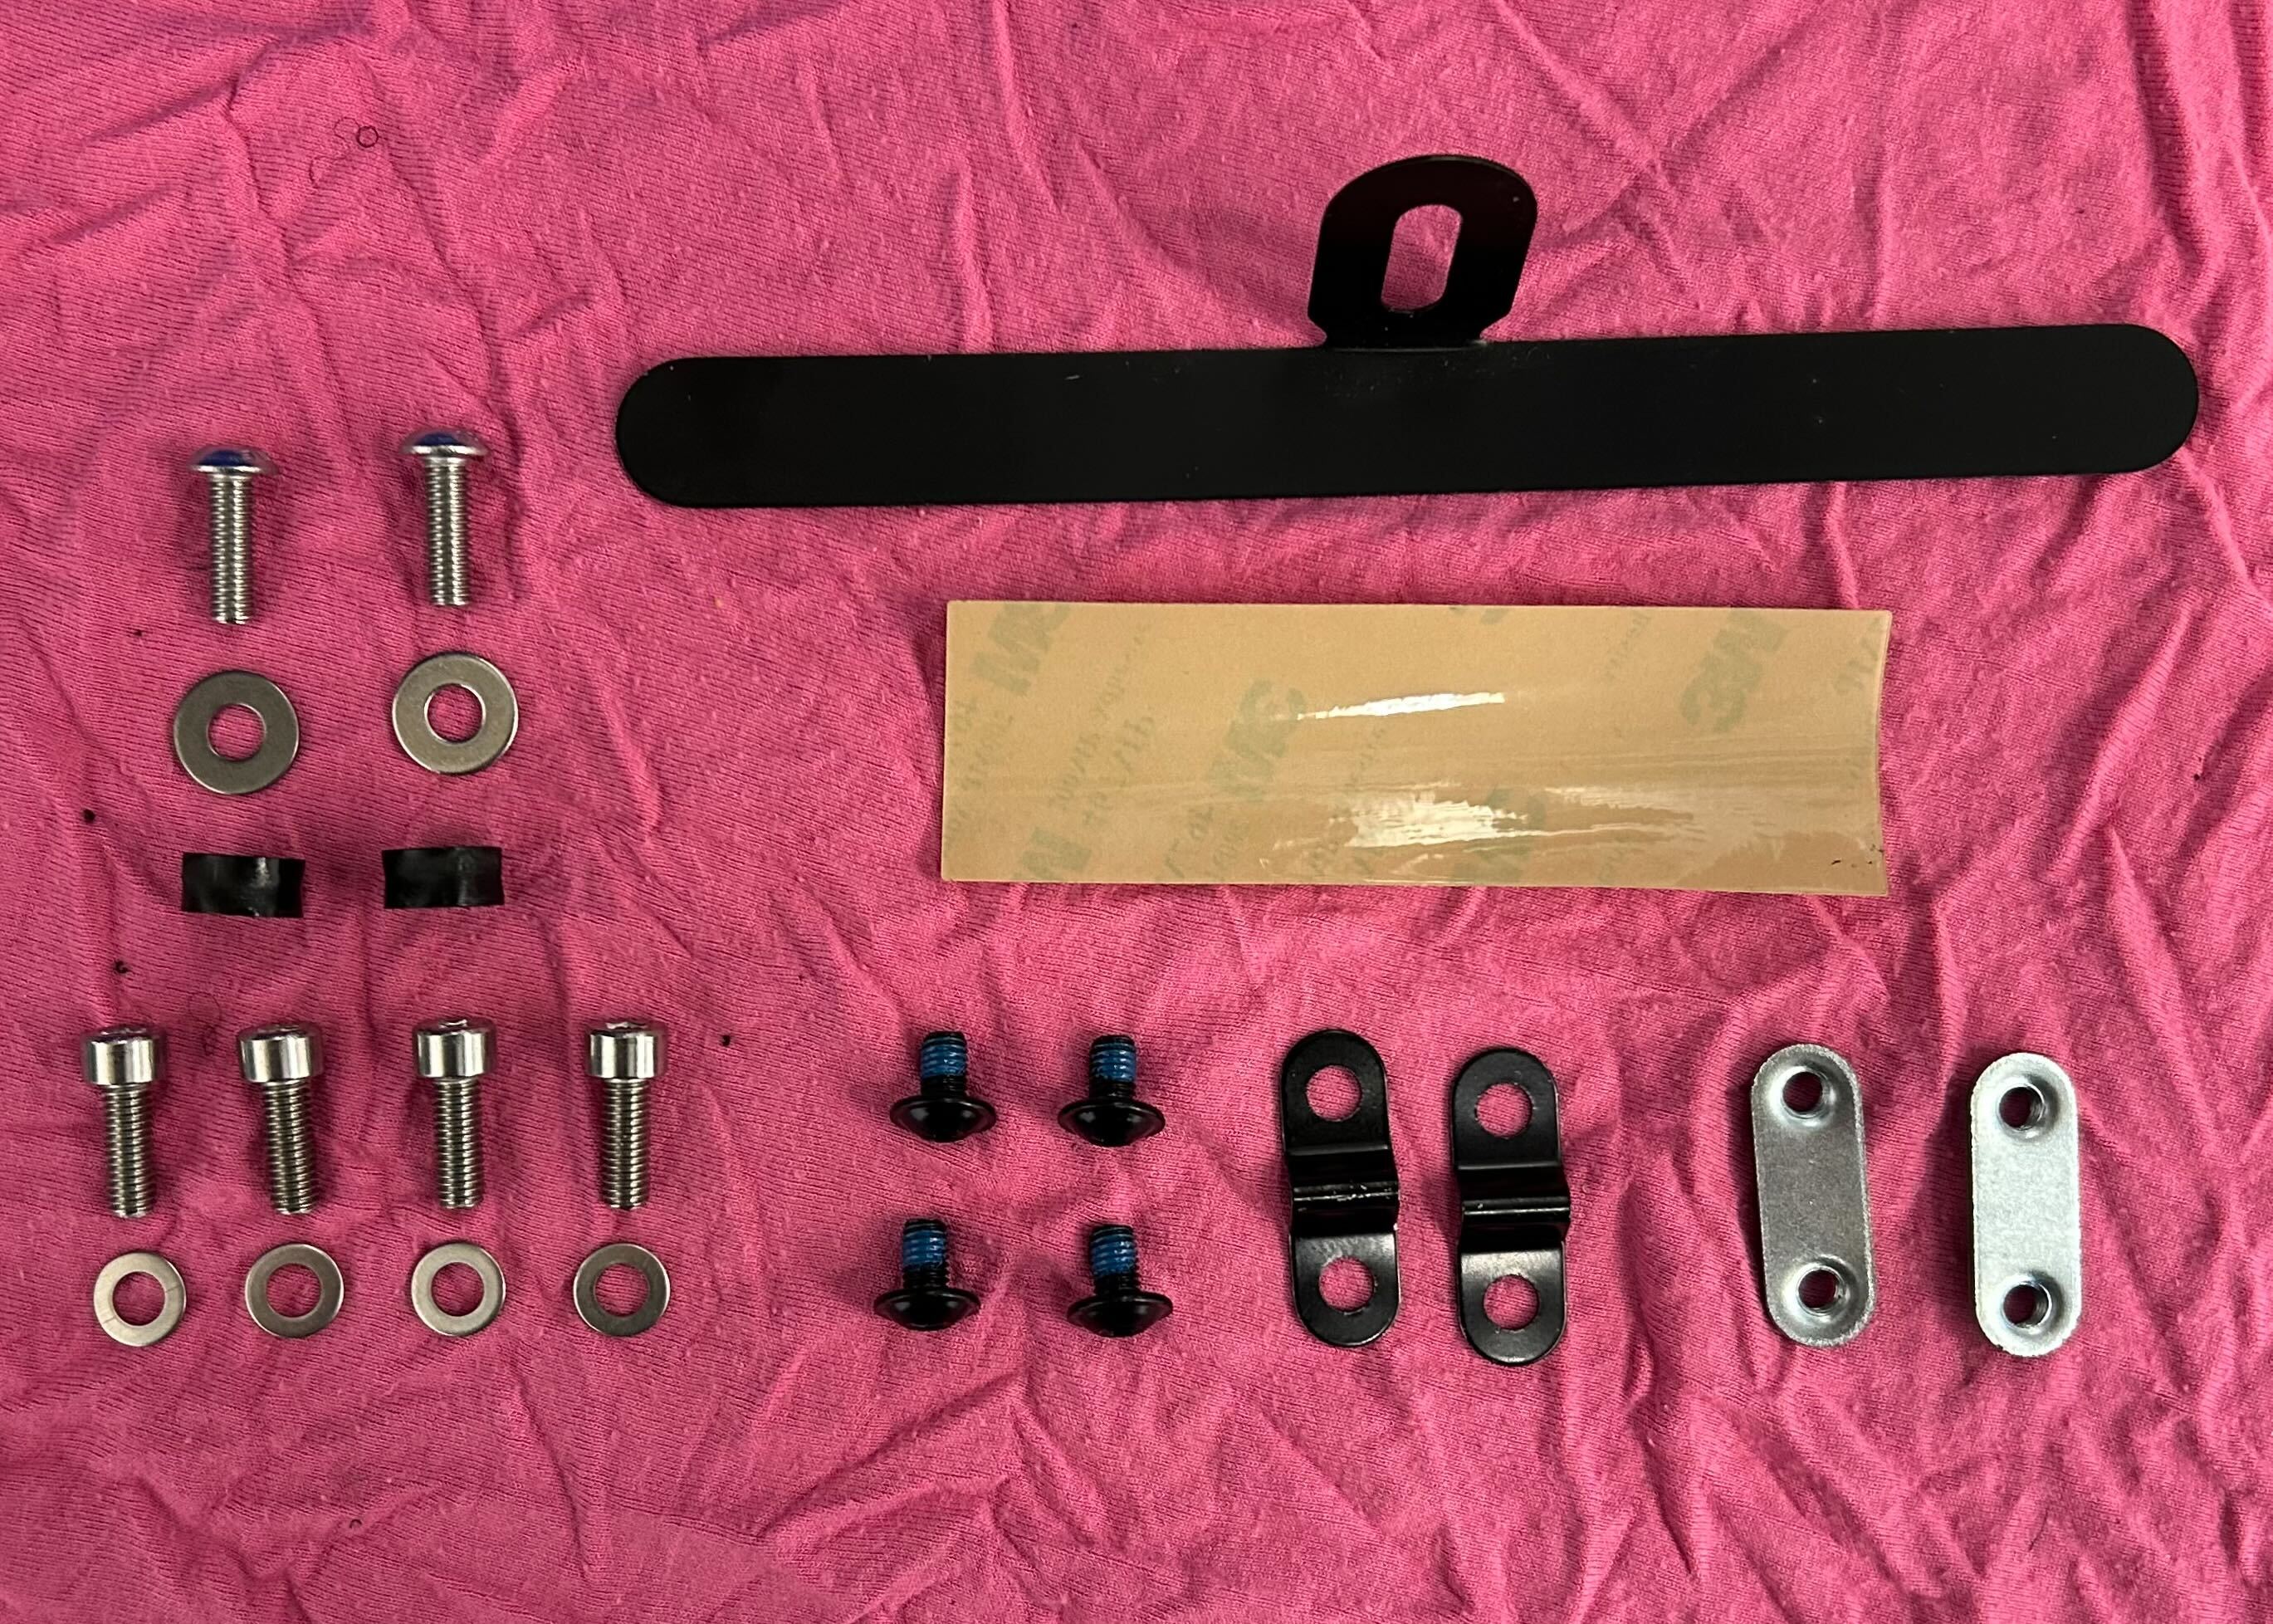 Hardware Kit - Basic
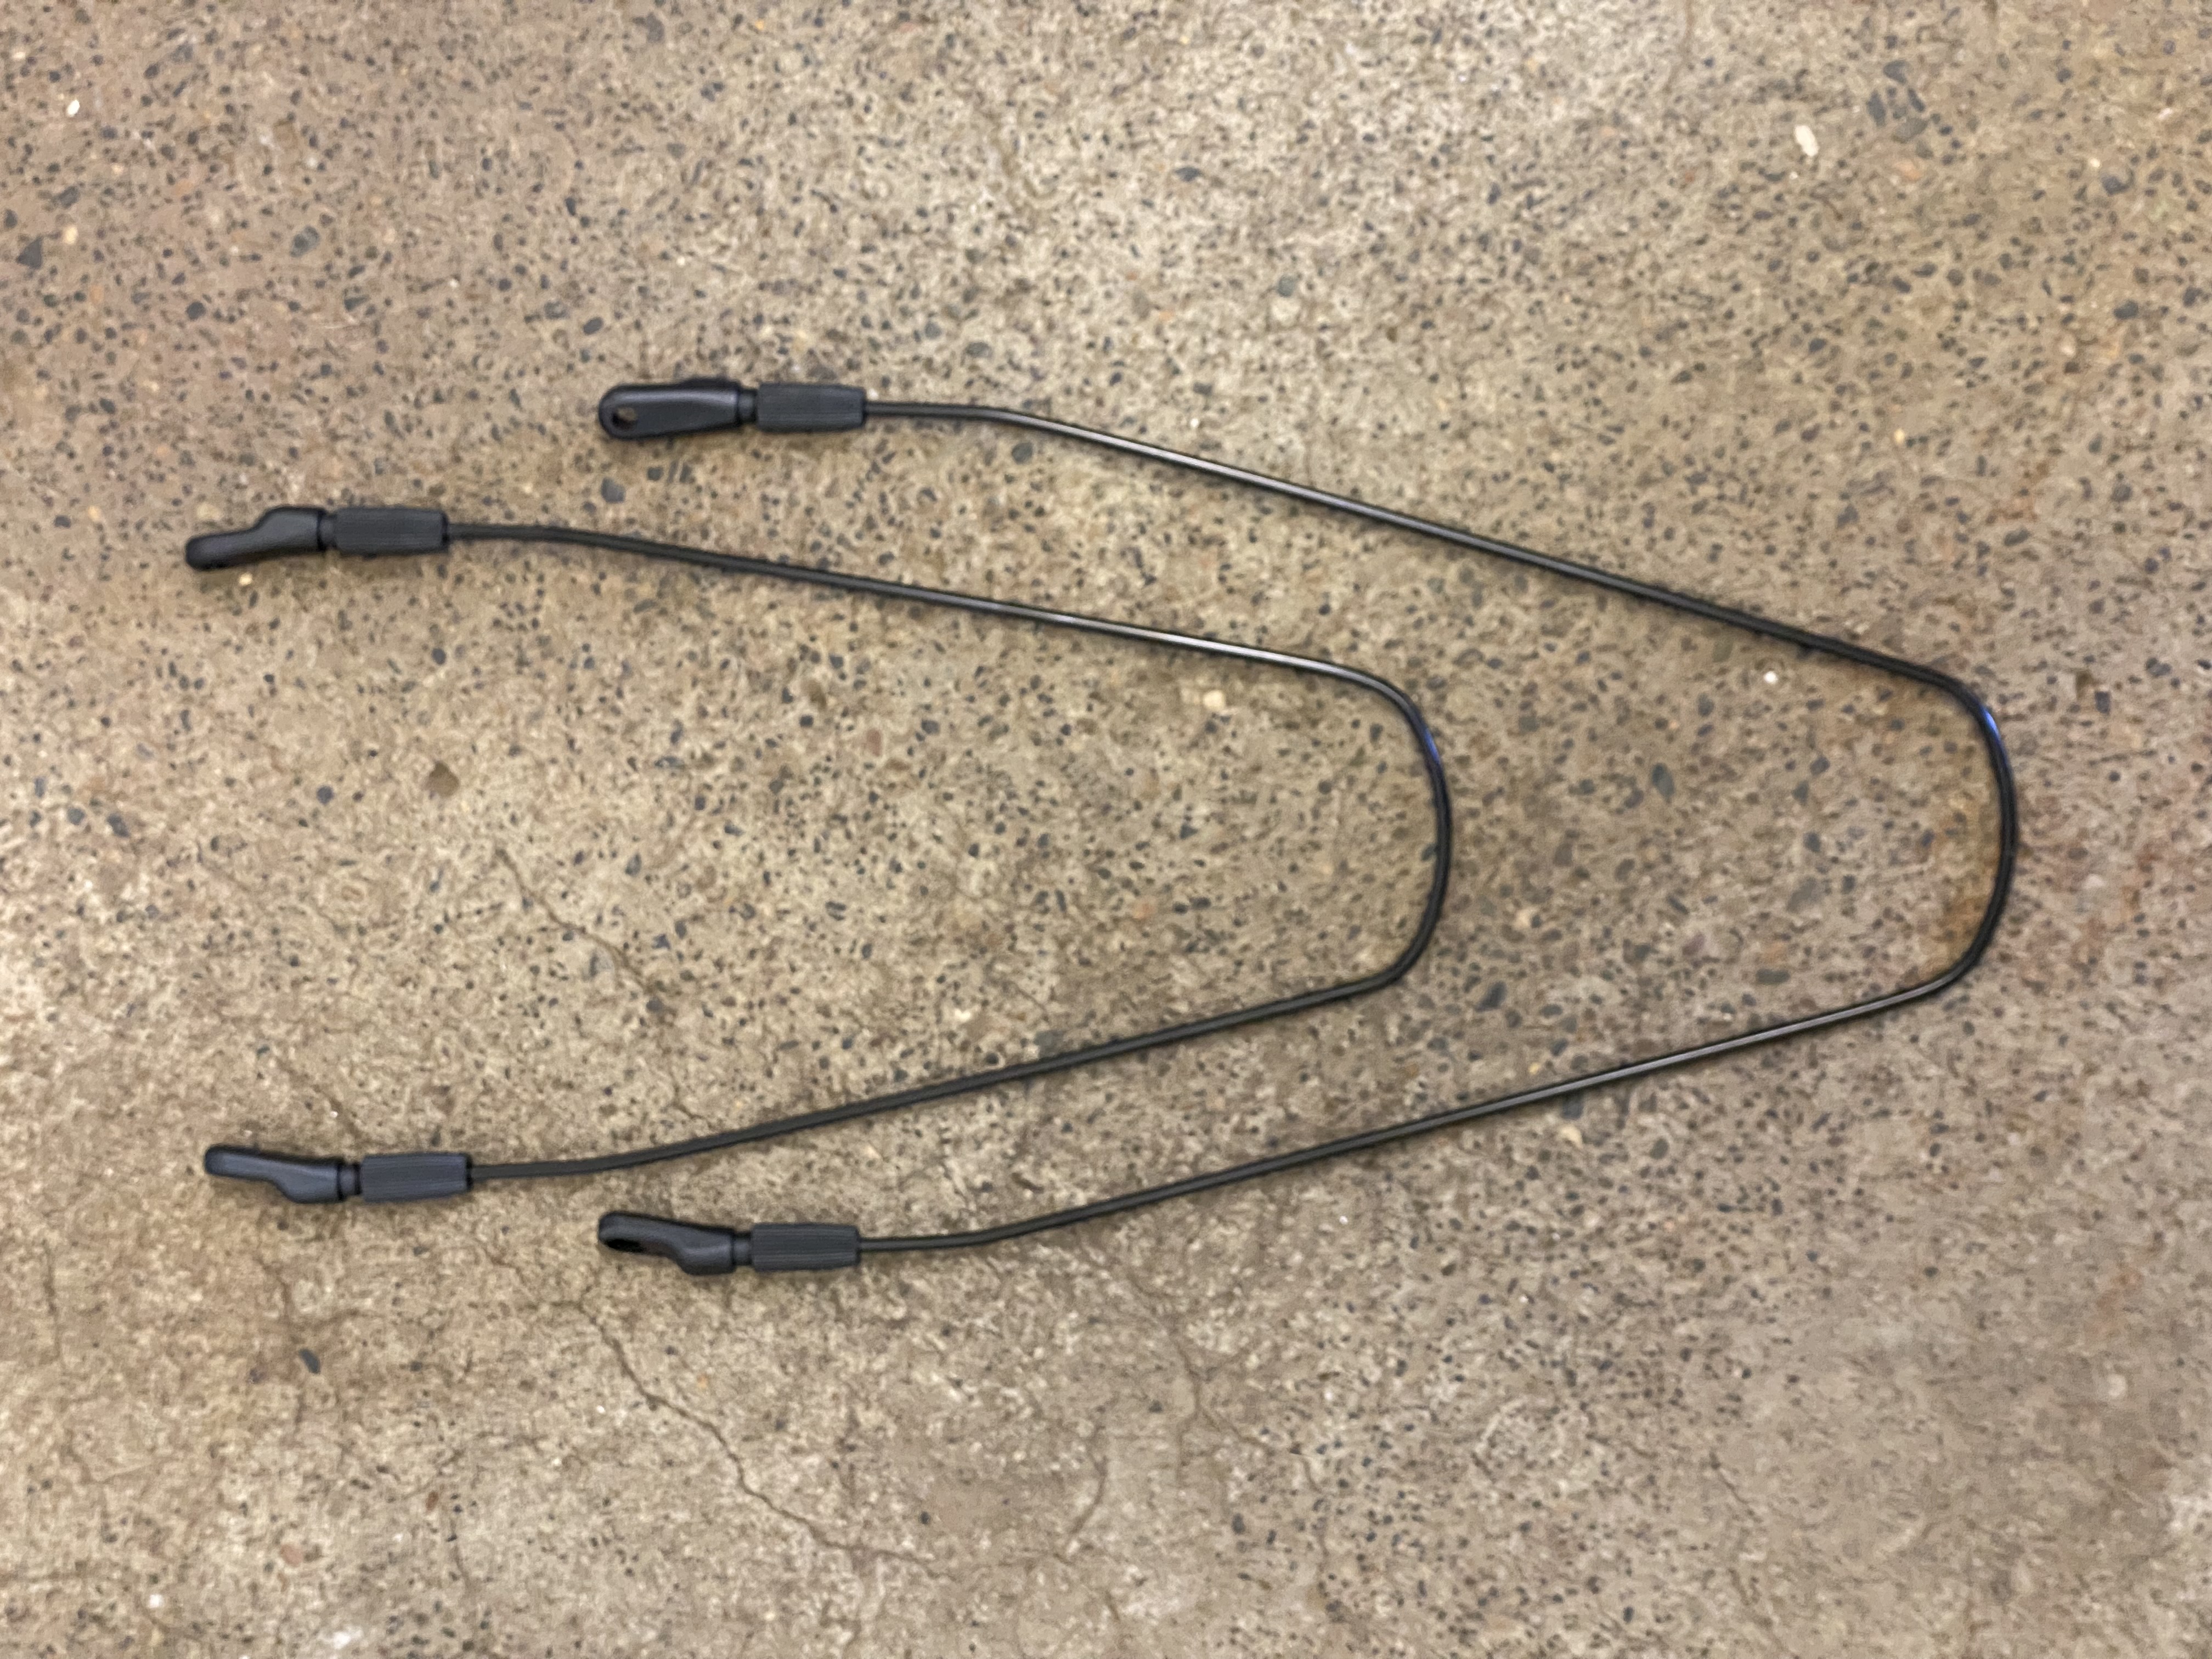 Fender Stays
The Basic Install Kit includes:
- Button Head M5 bolts + washers x 2 (silver)
- Plastic spacers x 2 (black)
- Cap Head M5 bolts + washers x 4 (silver)
- Button Head M5 bolts x 4 (black)
- Outer Fender Stay Brackets x 2 (black)
- Inner Fender Stay Brackets x 2 (silver)
- Anti-rattle adhesive strip x 1 (clear)
- Seat bridge bracket x 1 (black)
- Adjustable fender stays x 2 (black)
First-generation Vvolt ebikes with 27.5" wheels (Alpha, Alpha S, Centauri, Centauri S, not Sirius), we include the following M6x80mm bolt to mount the front fender to the fork crown:
 Thru-bolt for first-generation Vvolt ebike fork crown mounts
Installation
- Use the small black button-head M5 bolts, outer fender stay brackets, and inner fender stay brackets to attach the fender stays to the correct blade. The shorter stays are for the front fender; the longer stays are for the rear fender. Attach both stays the same way:
 Black brackets on the outside
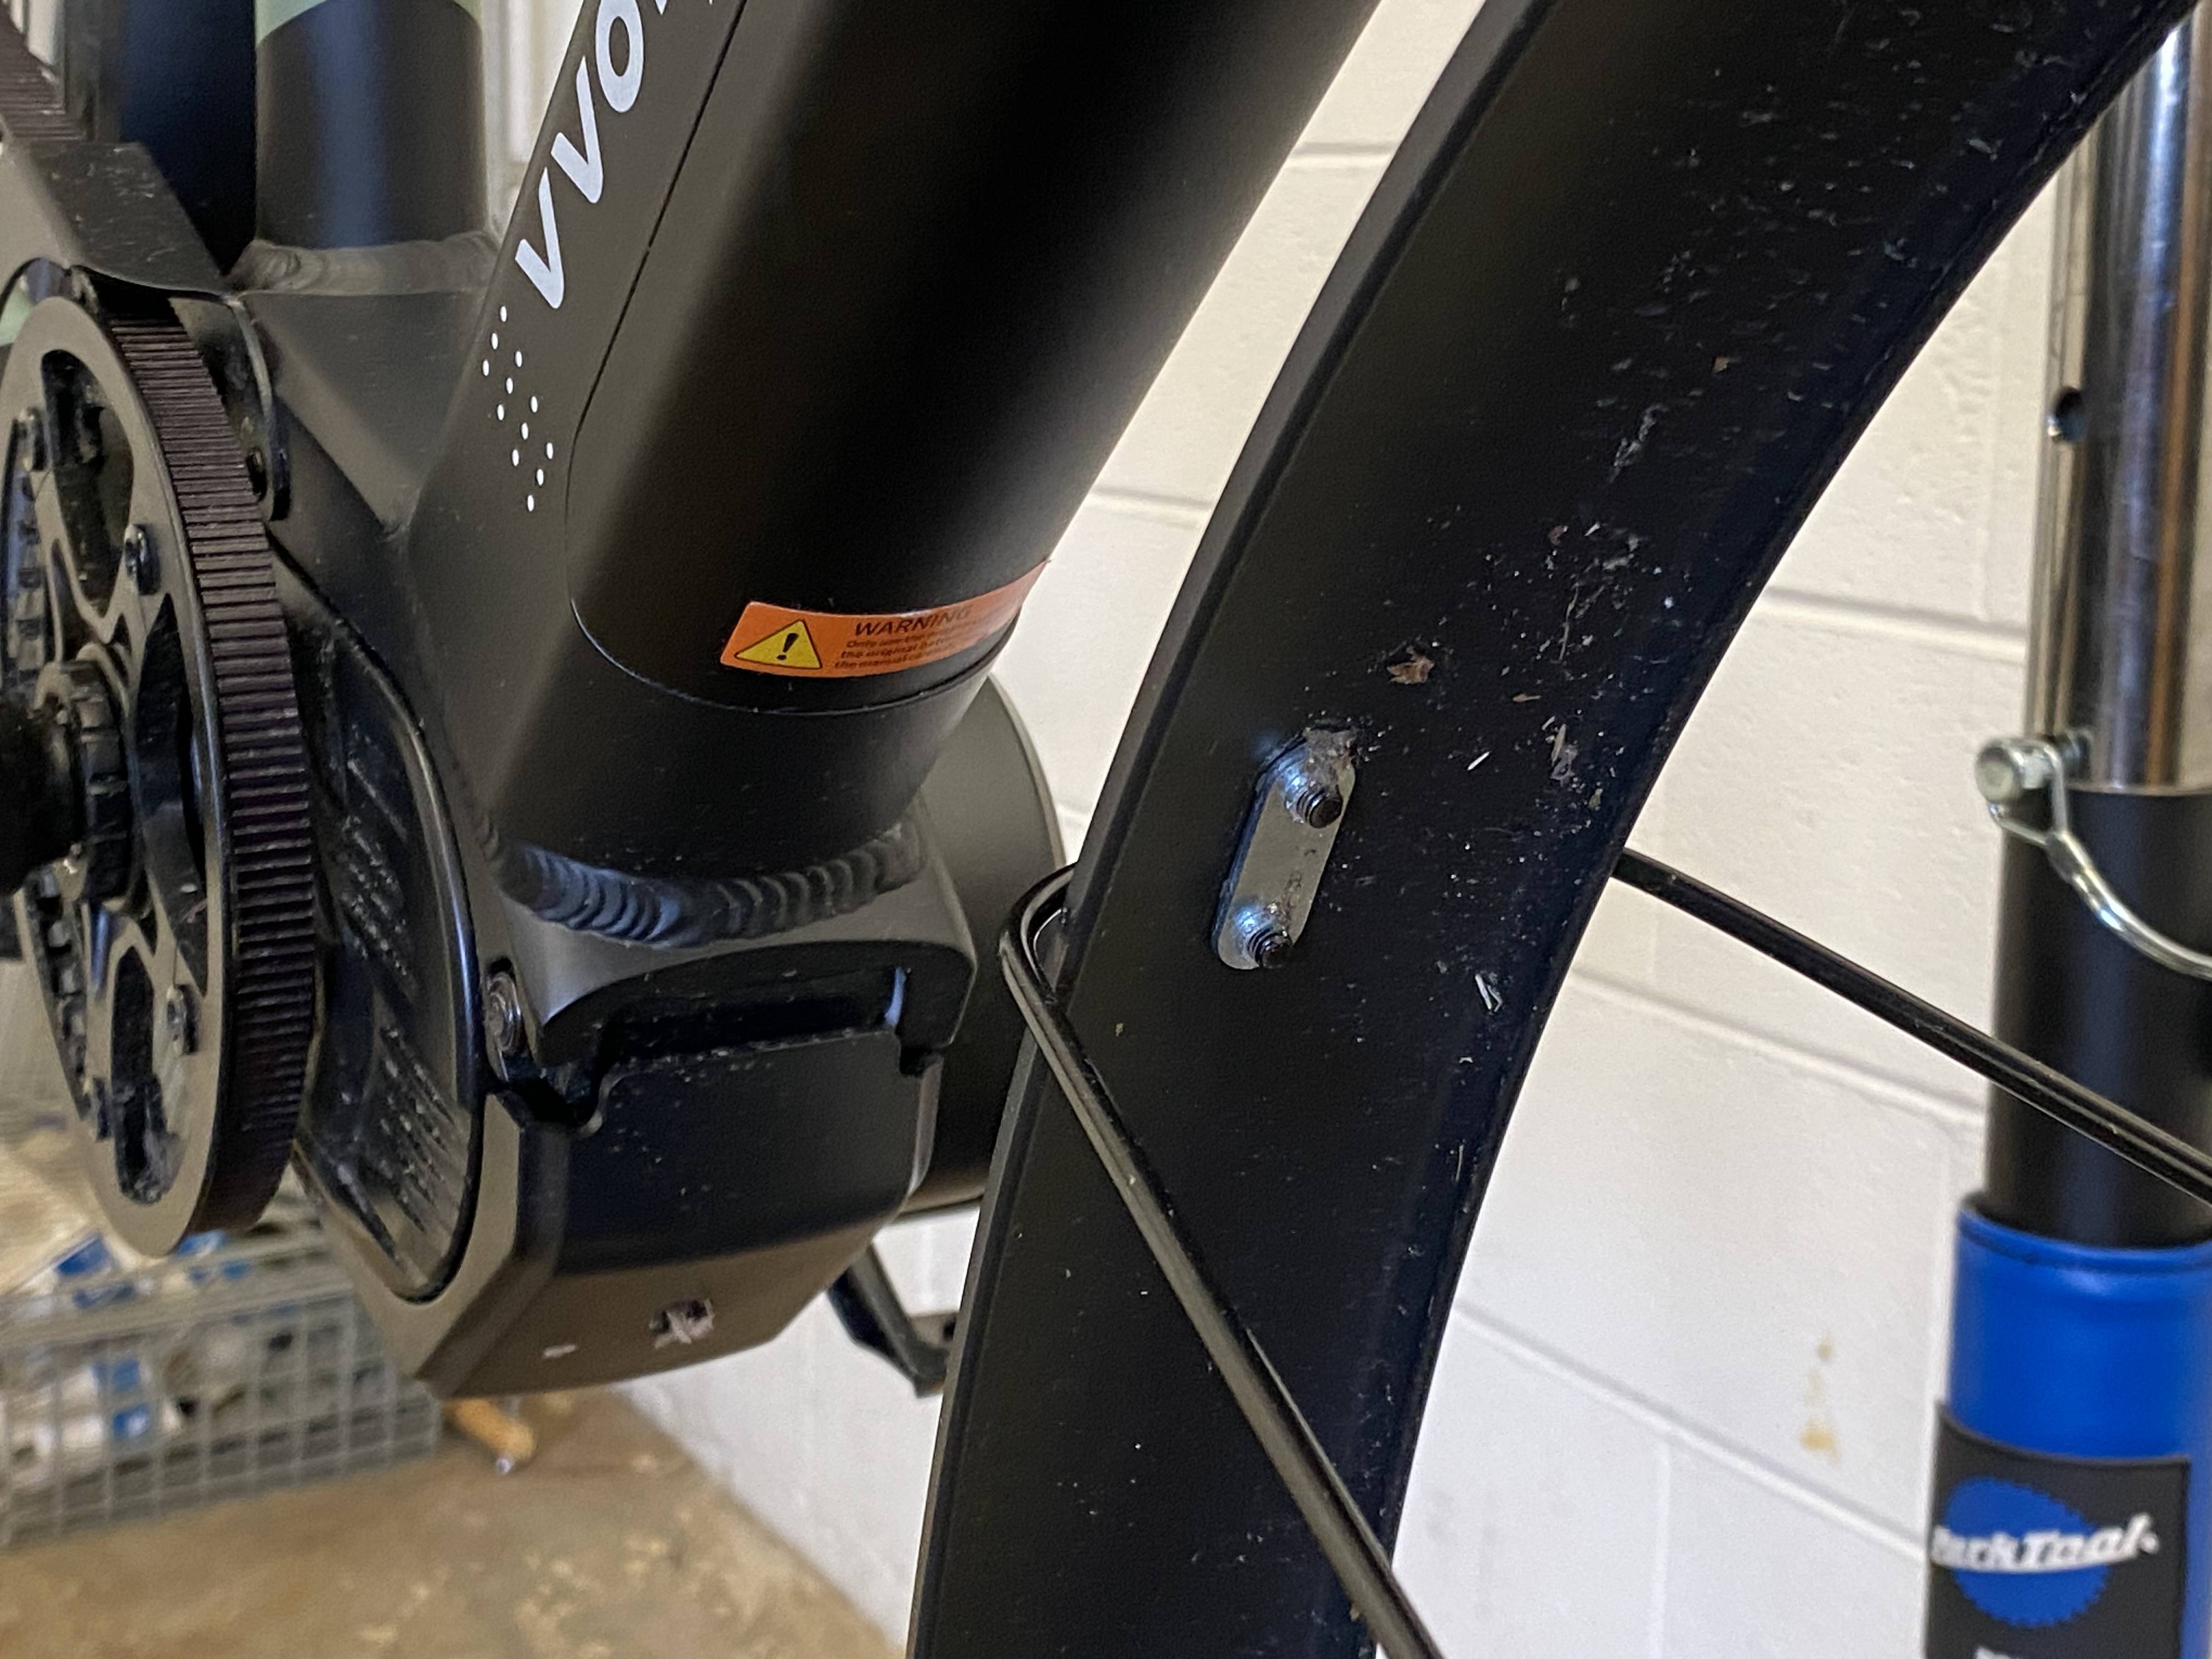 Silver brackets on the inside.
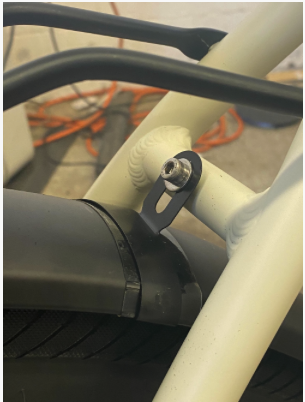
 - The tab on the front fender attaches to the fork crown. Second-generation Vvolt bikes include a fixed bolt to secure the blade, while first-generation bikes require a long through-bolt and nut.
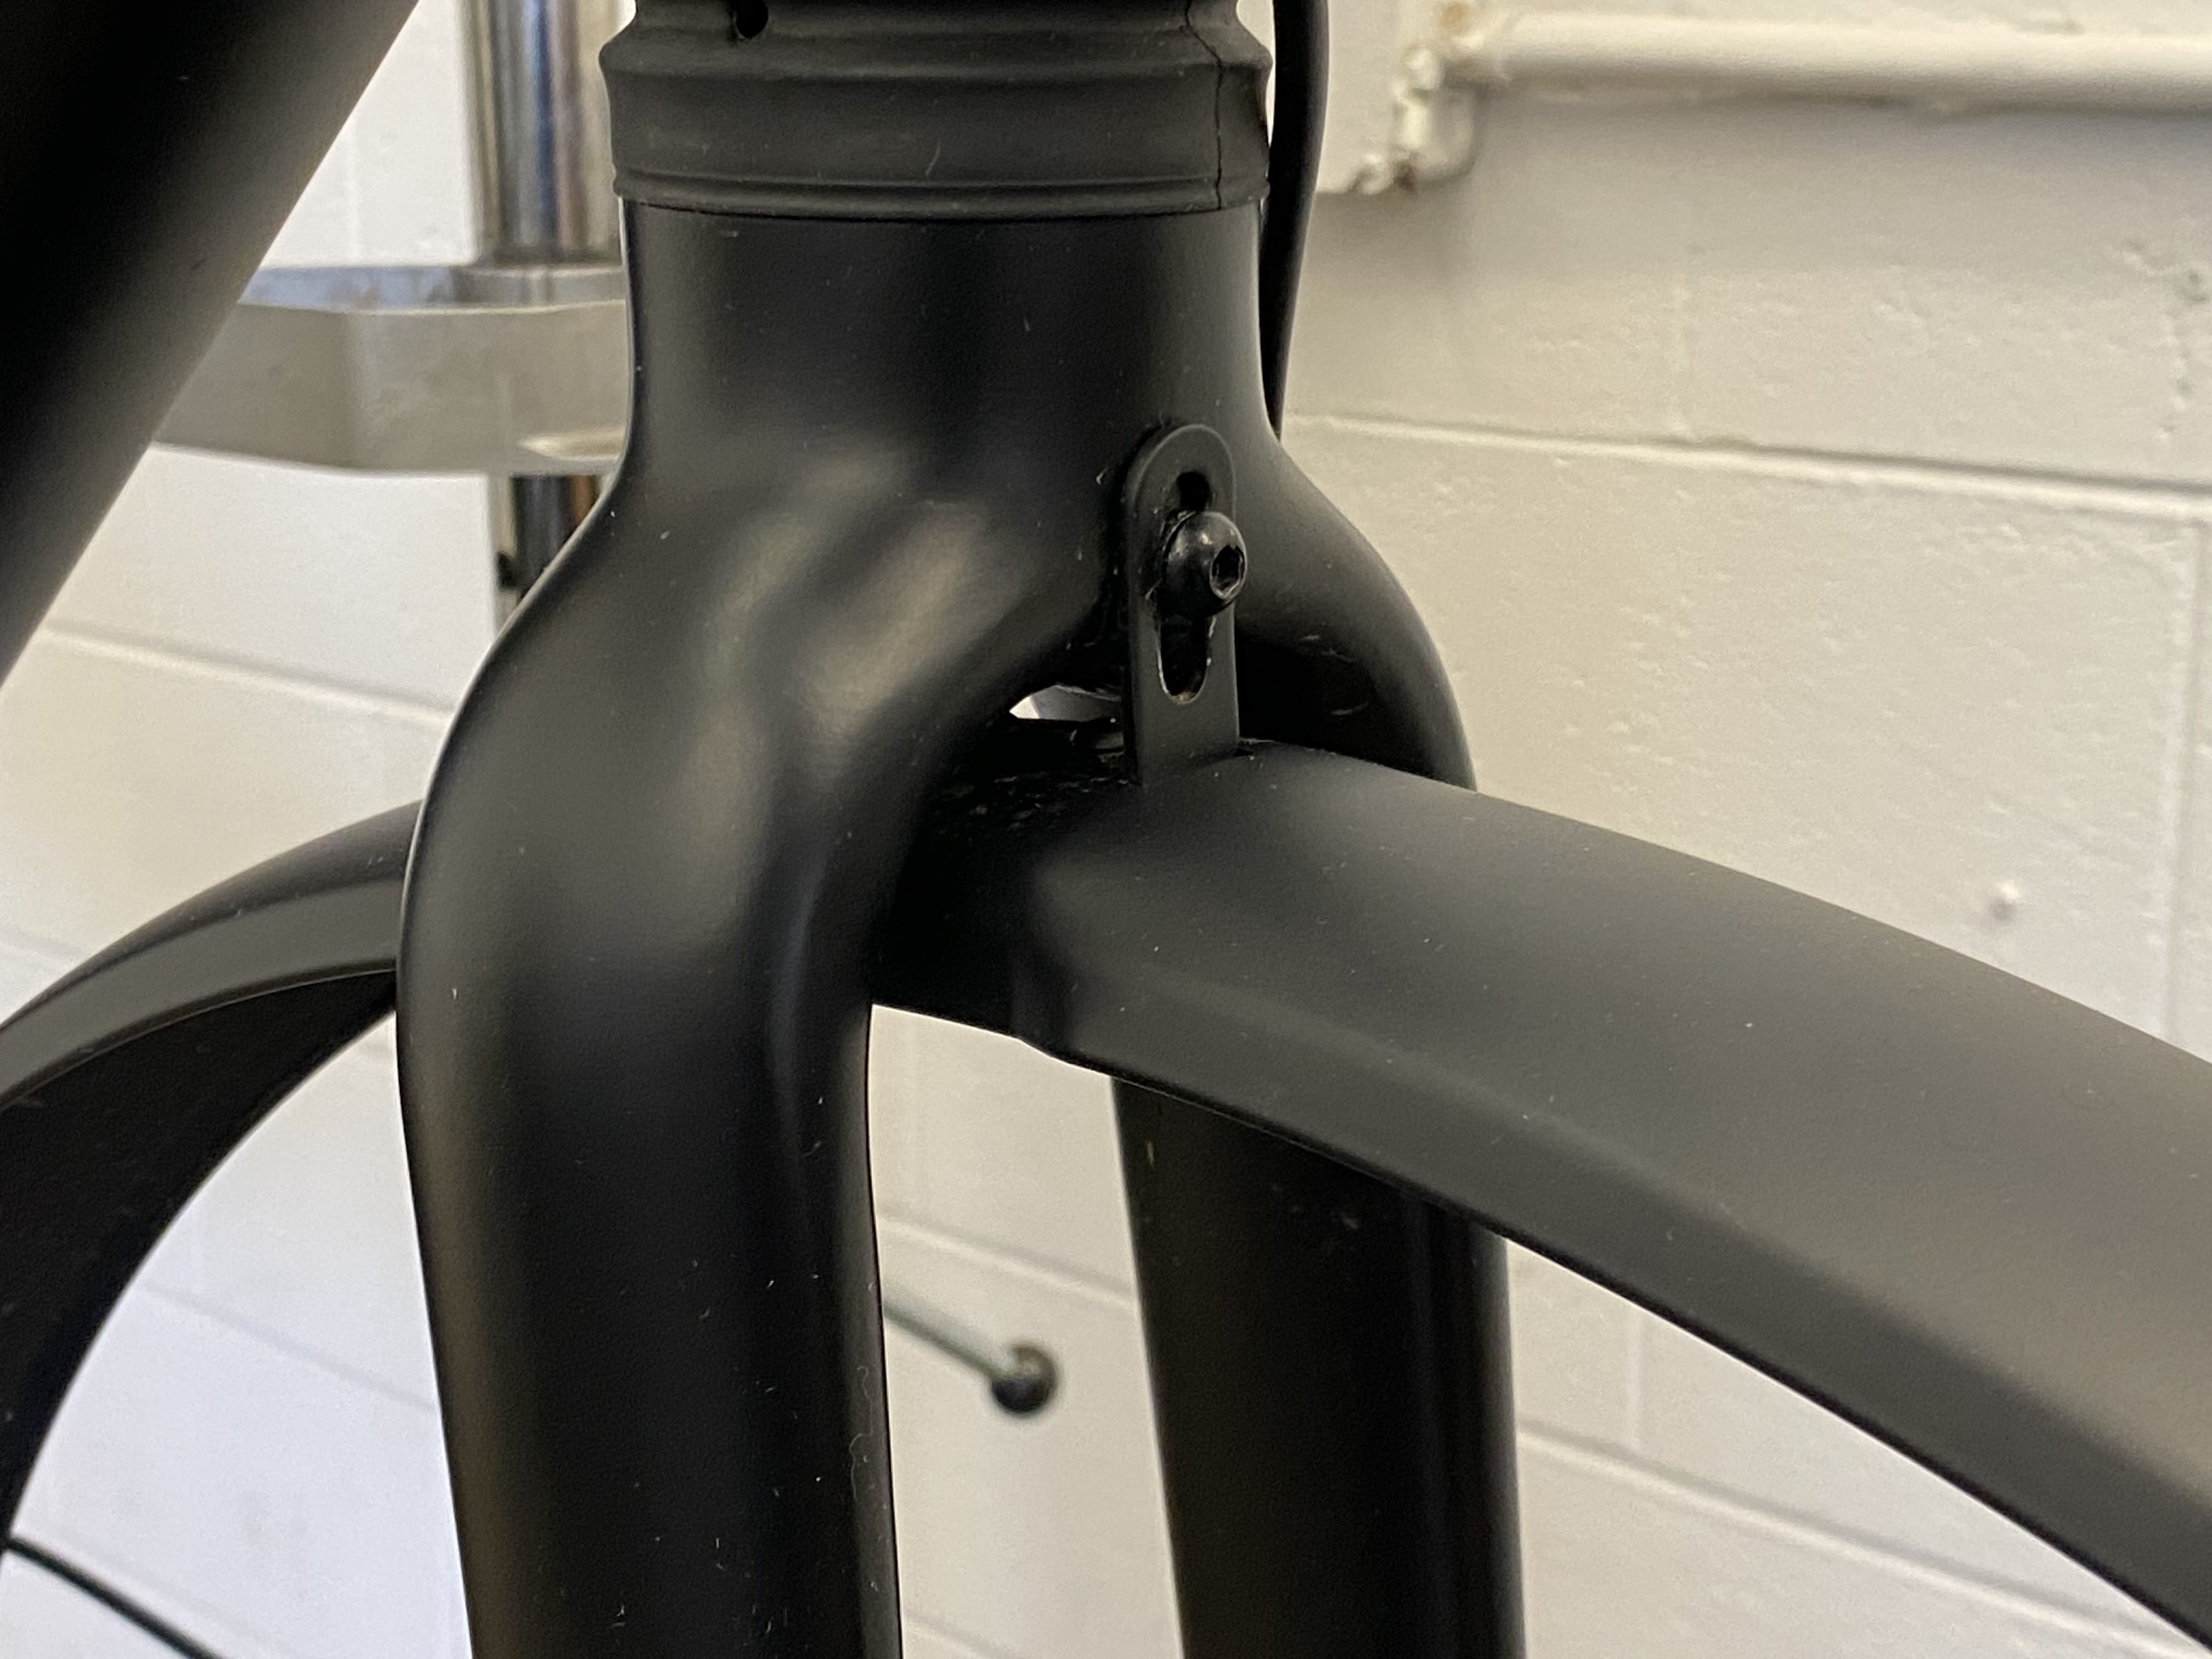 Front fender attached to the fork crown
 - Use the cap-head M5 bolts and washers to attach the front fender to the lowest 3-pack mount on the fork legs. Note that we bend the fender stays instead of trimming them to achieve a good fender line.
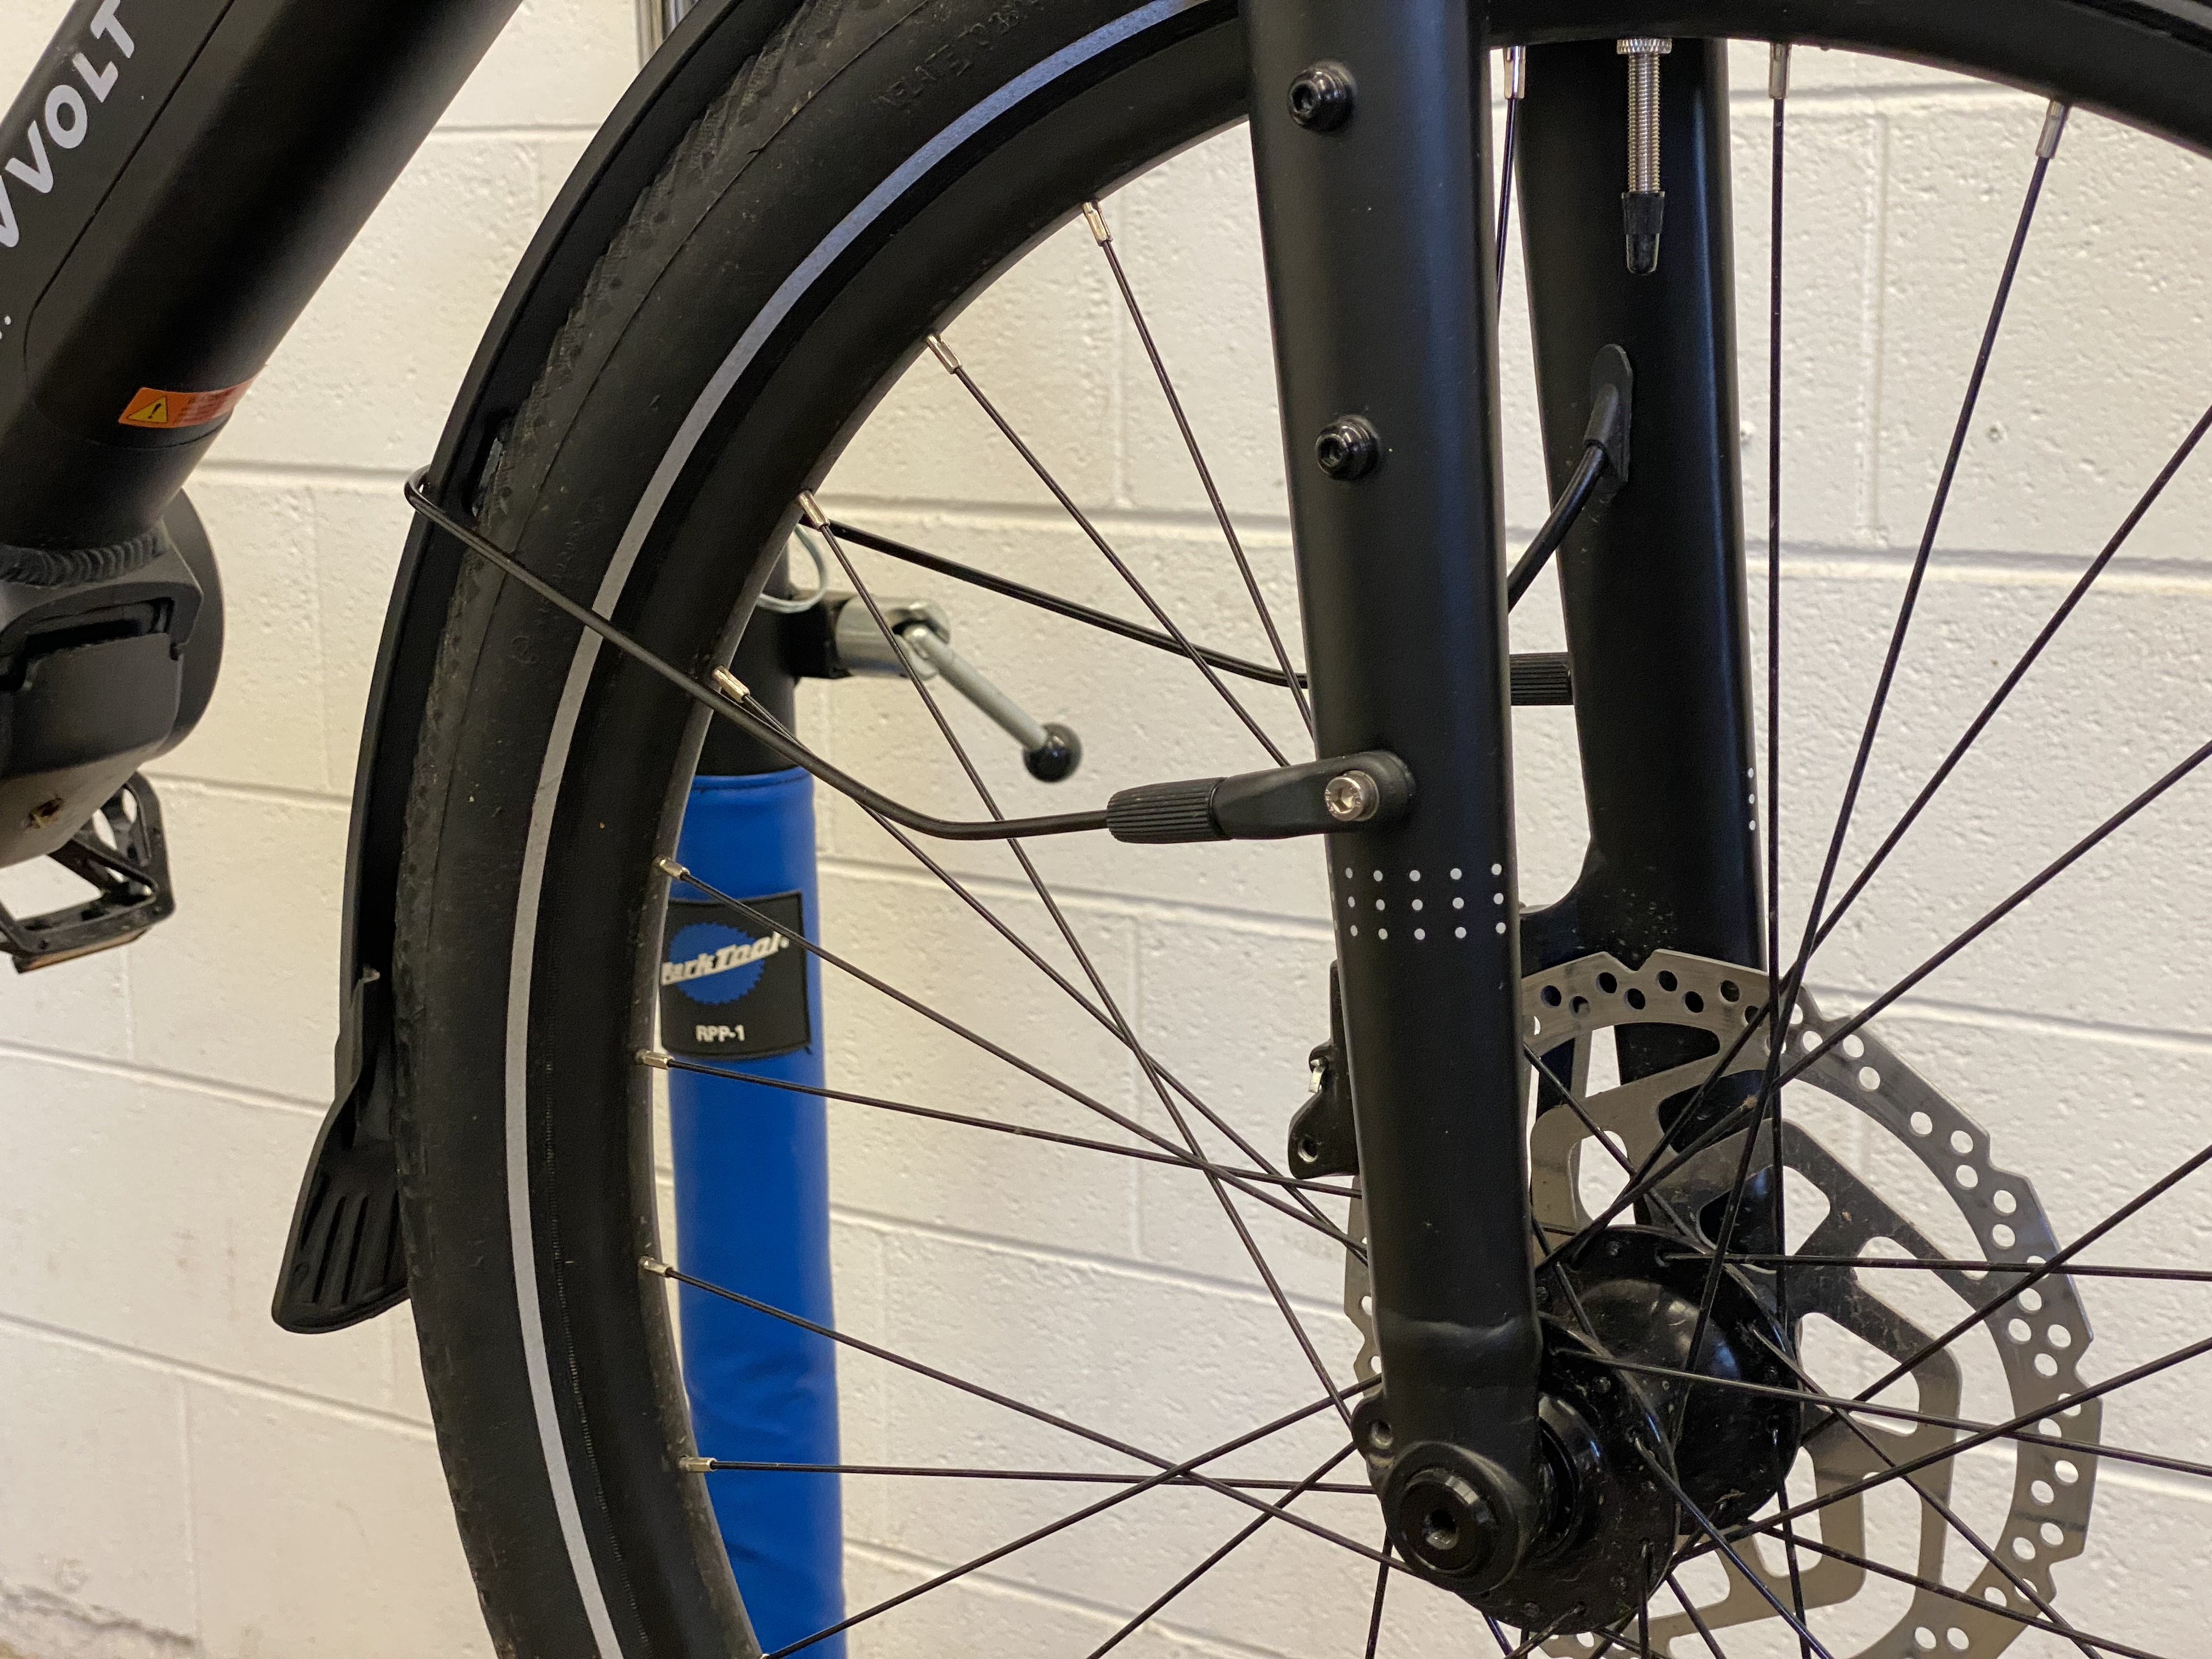
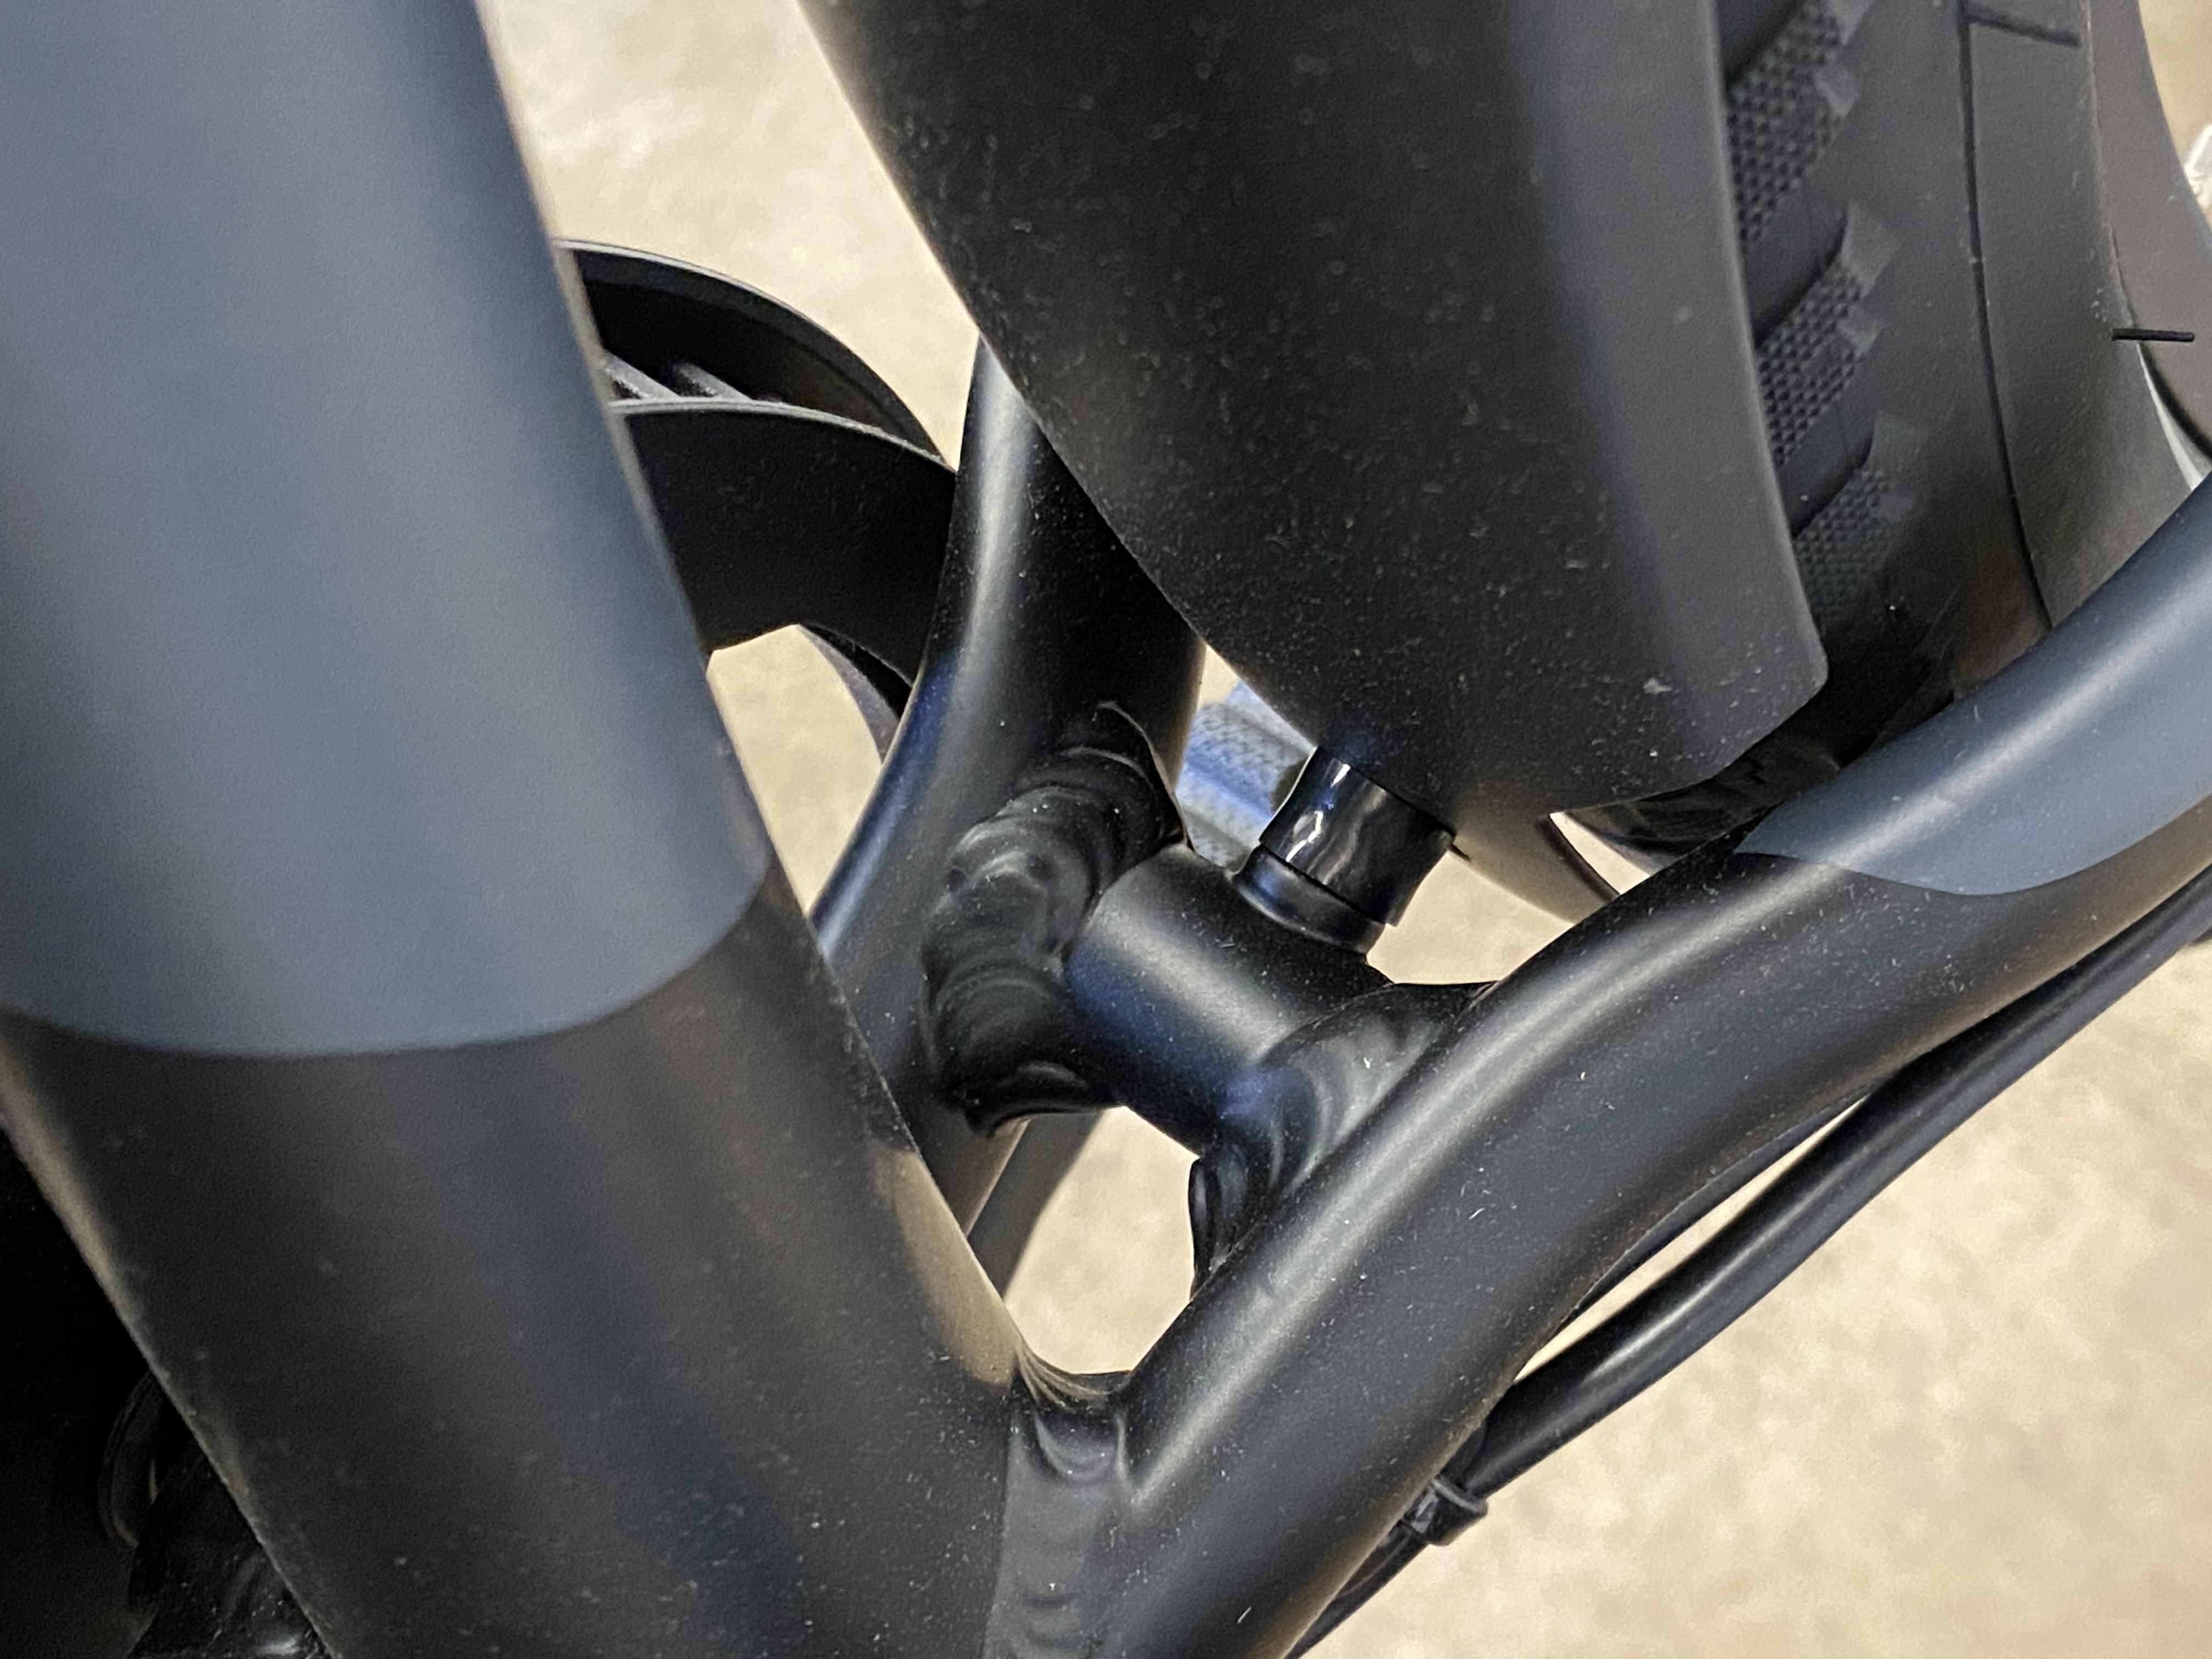
- The fender stay adjusters, located at the end of each fender stay, are used to adjust the gap between the fender and tire. Lossen the adjusters by spinning the knurled portion counter-clockwise, adjust your stays accordingly, and then tighten them by spinning clockwise.
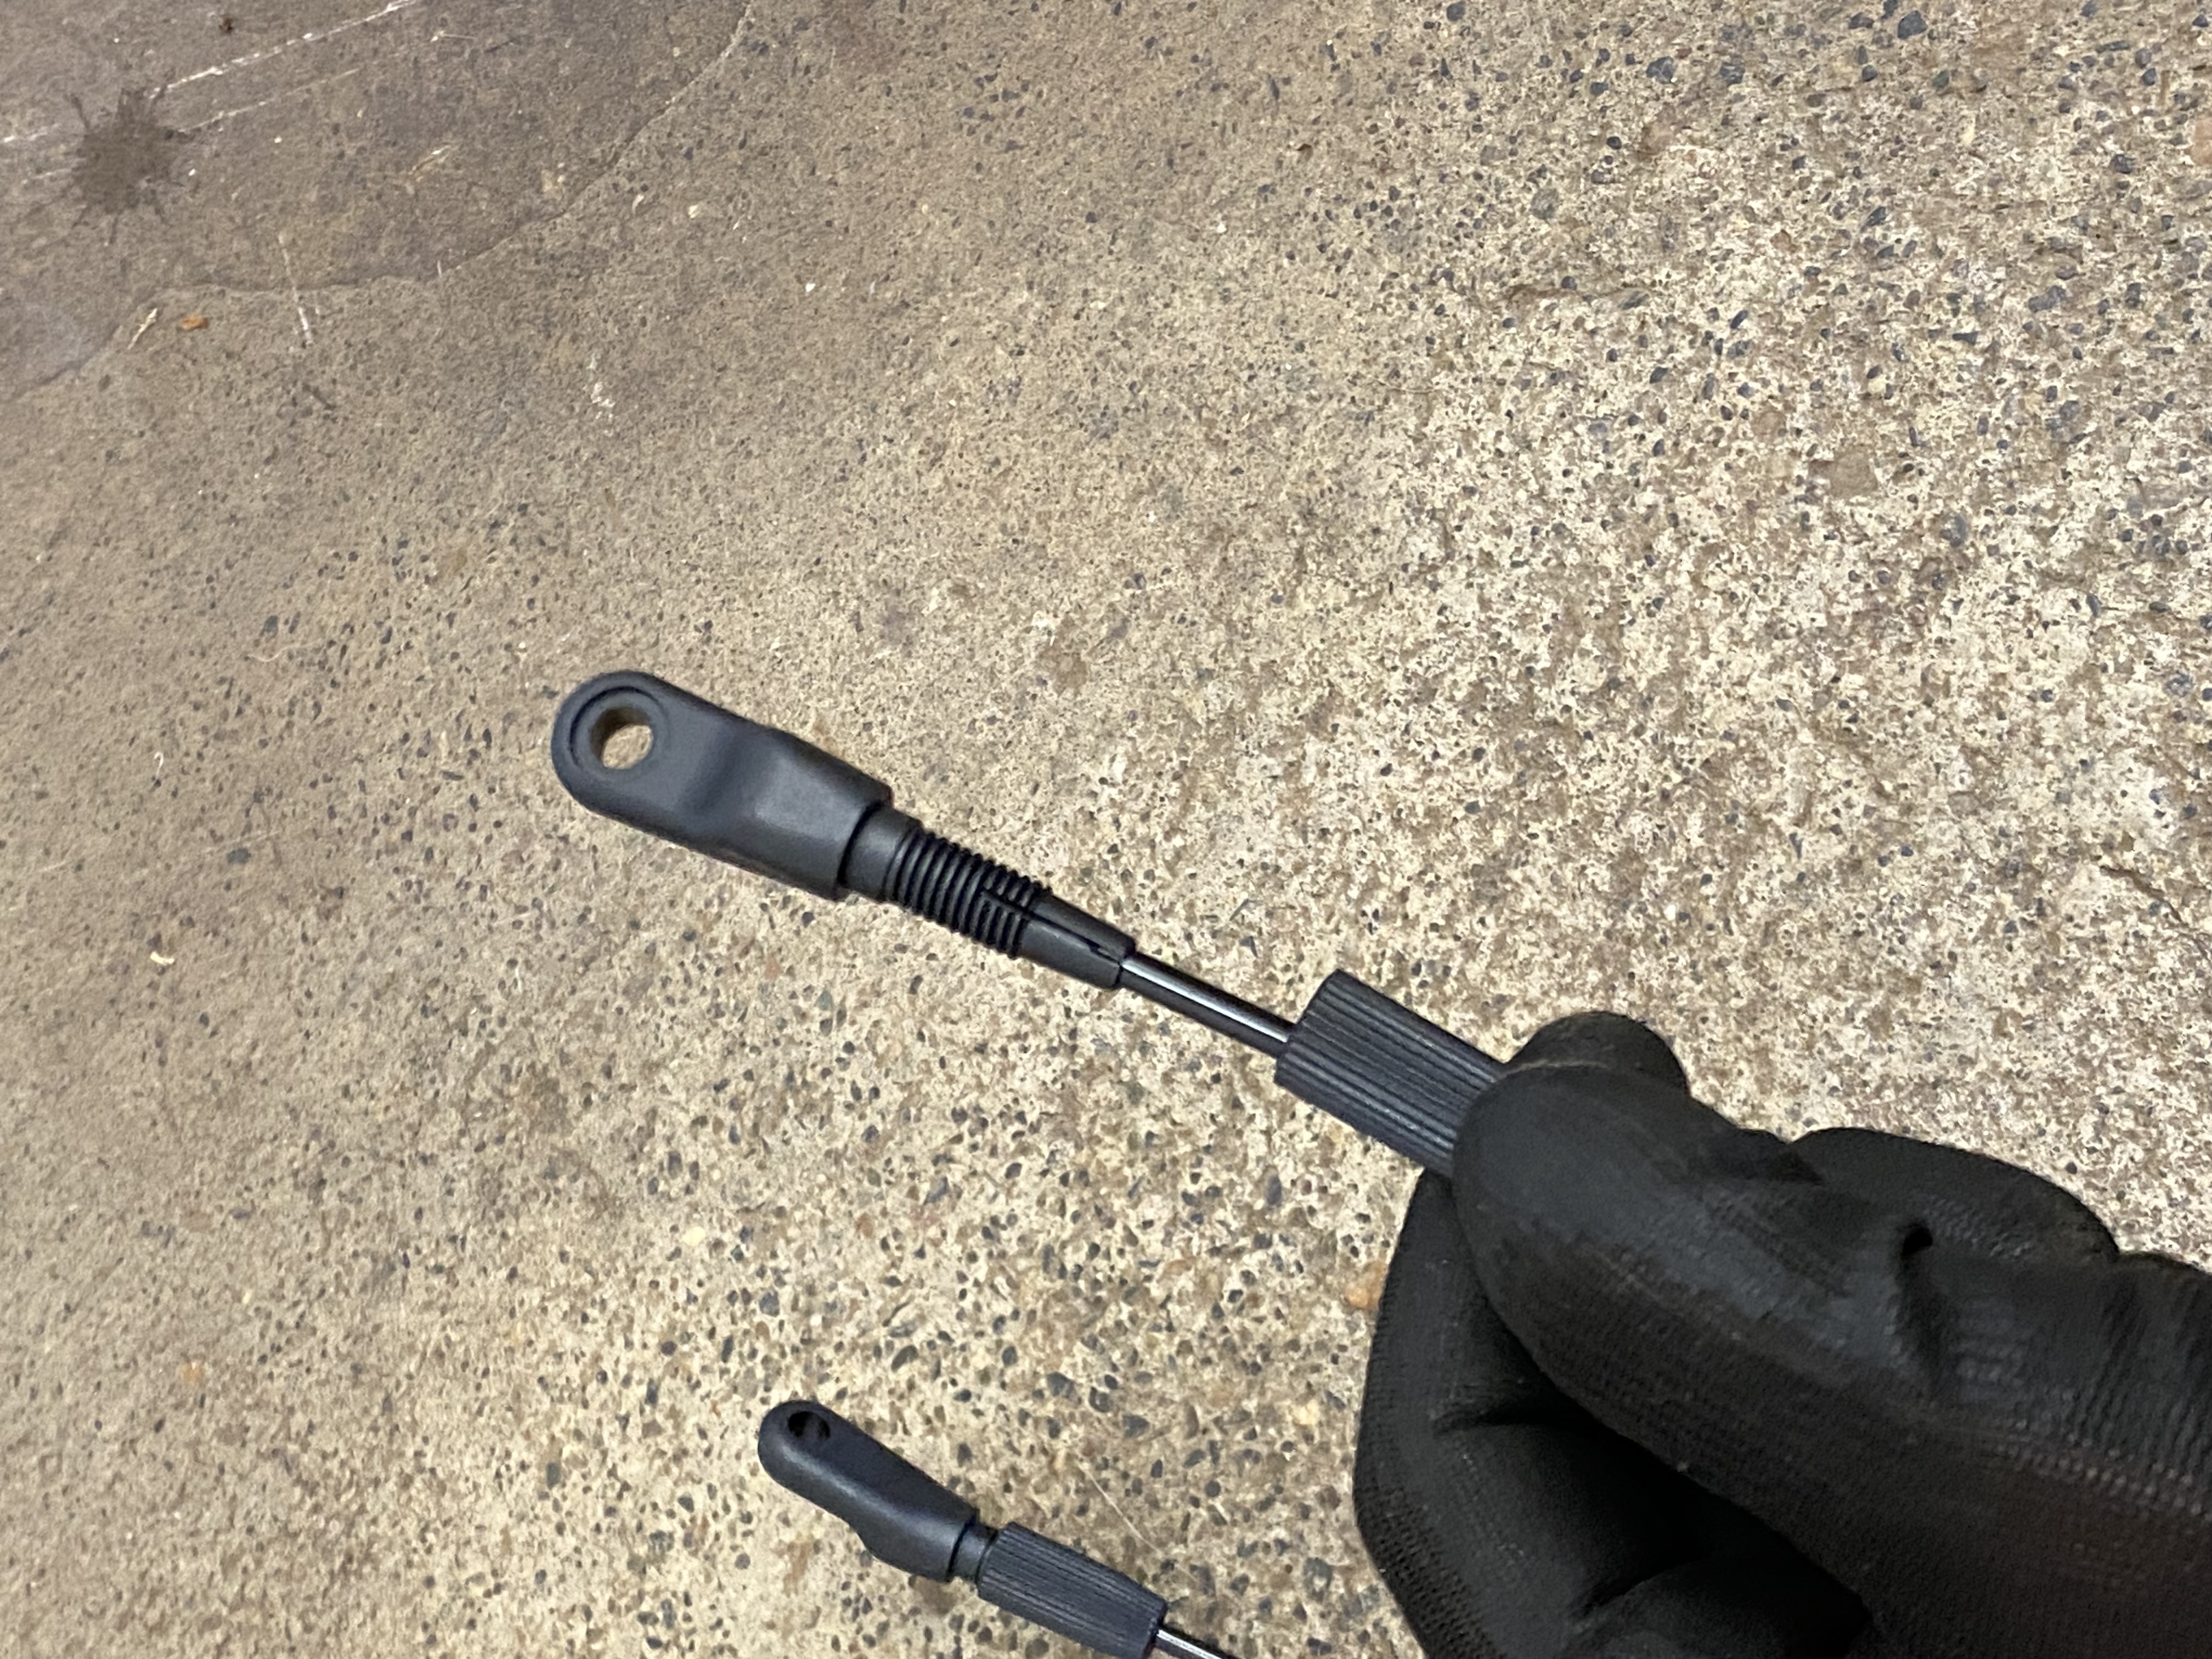 Loosened stay adjuster
 - *Fitting the rear fender is easiest with the wheel removed. However, you can deflate the rear tire and use zip ties to cinch the tire to the rim, giving you a bit more room to secure the fender at the chainstay bridge and seat stay bridge. We strongly suggest removing the rear wheel to make installation easier!*
- Loosely attach the seat stay bridge bracket to the frame using a cap head M5 bolt and washer. Do not tighten it completely since you'll need to adjust it up or down depending on your tire clearance.
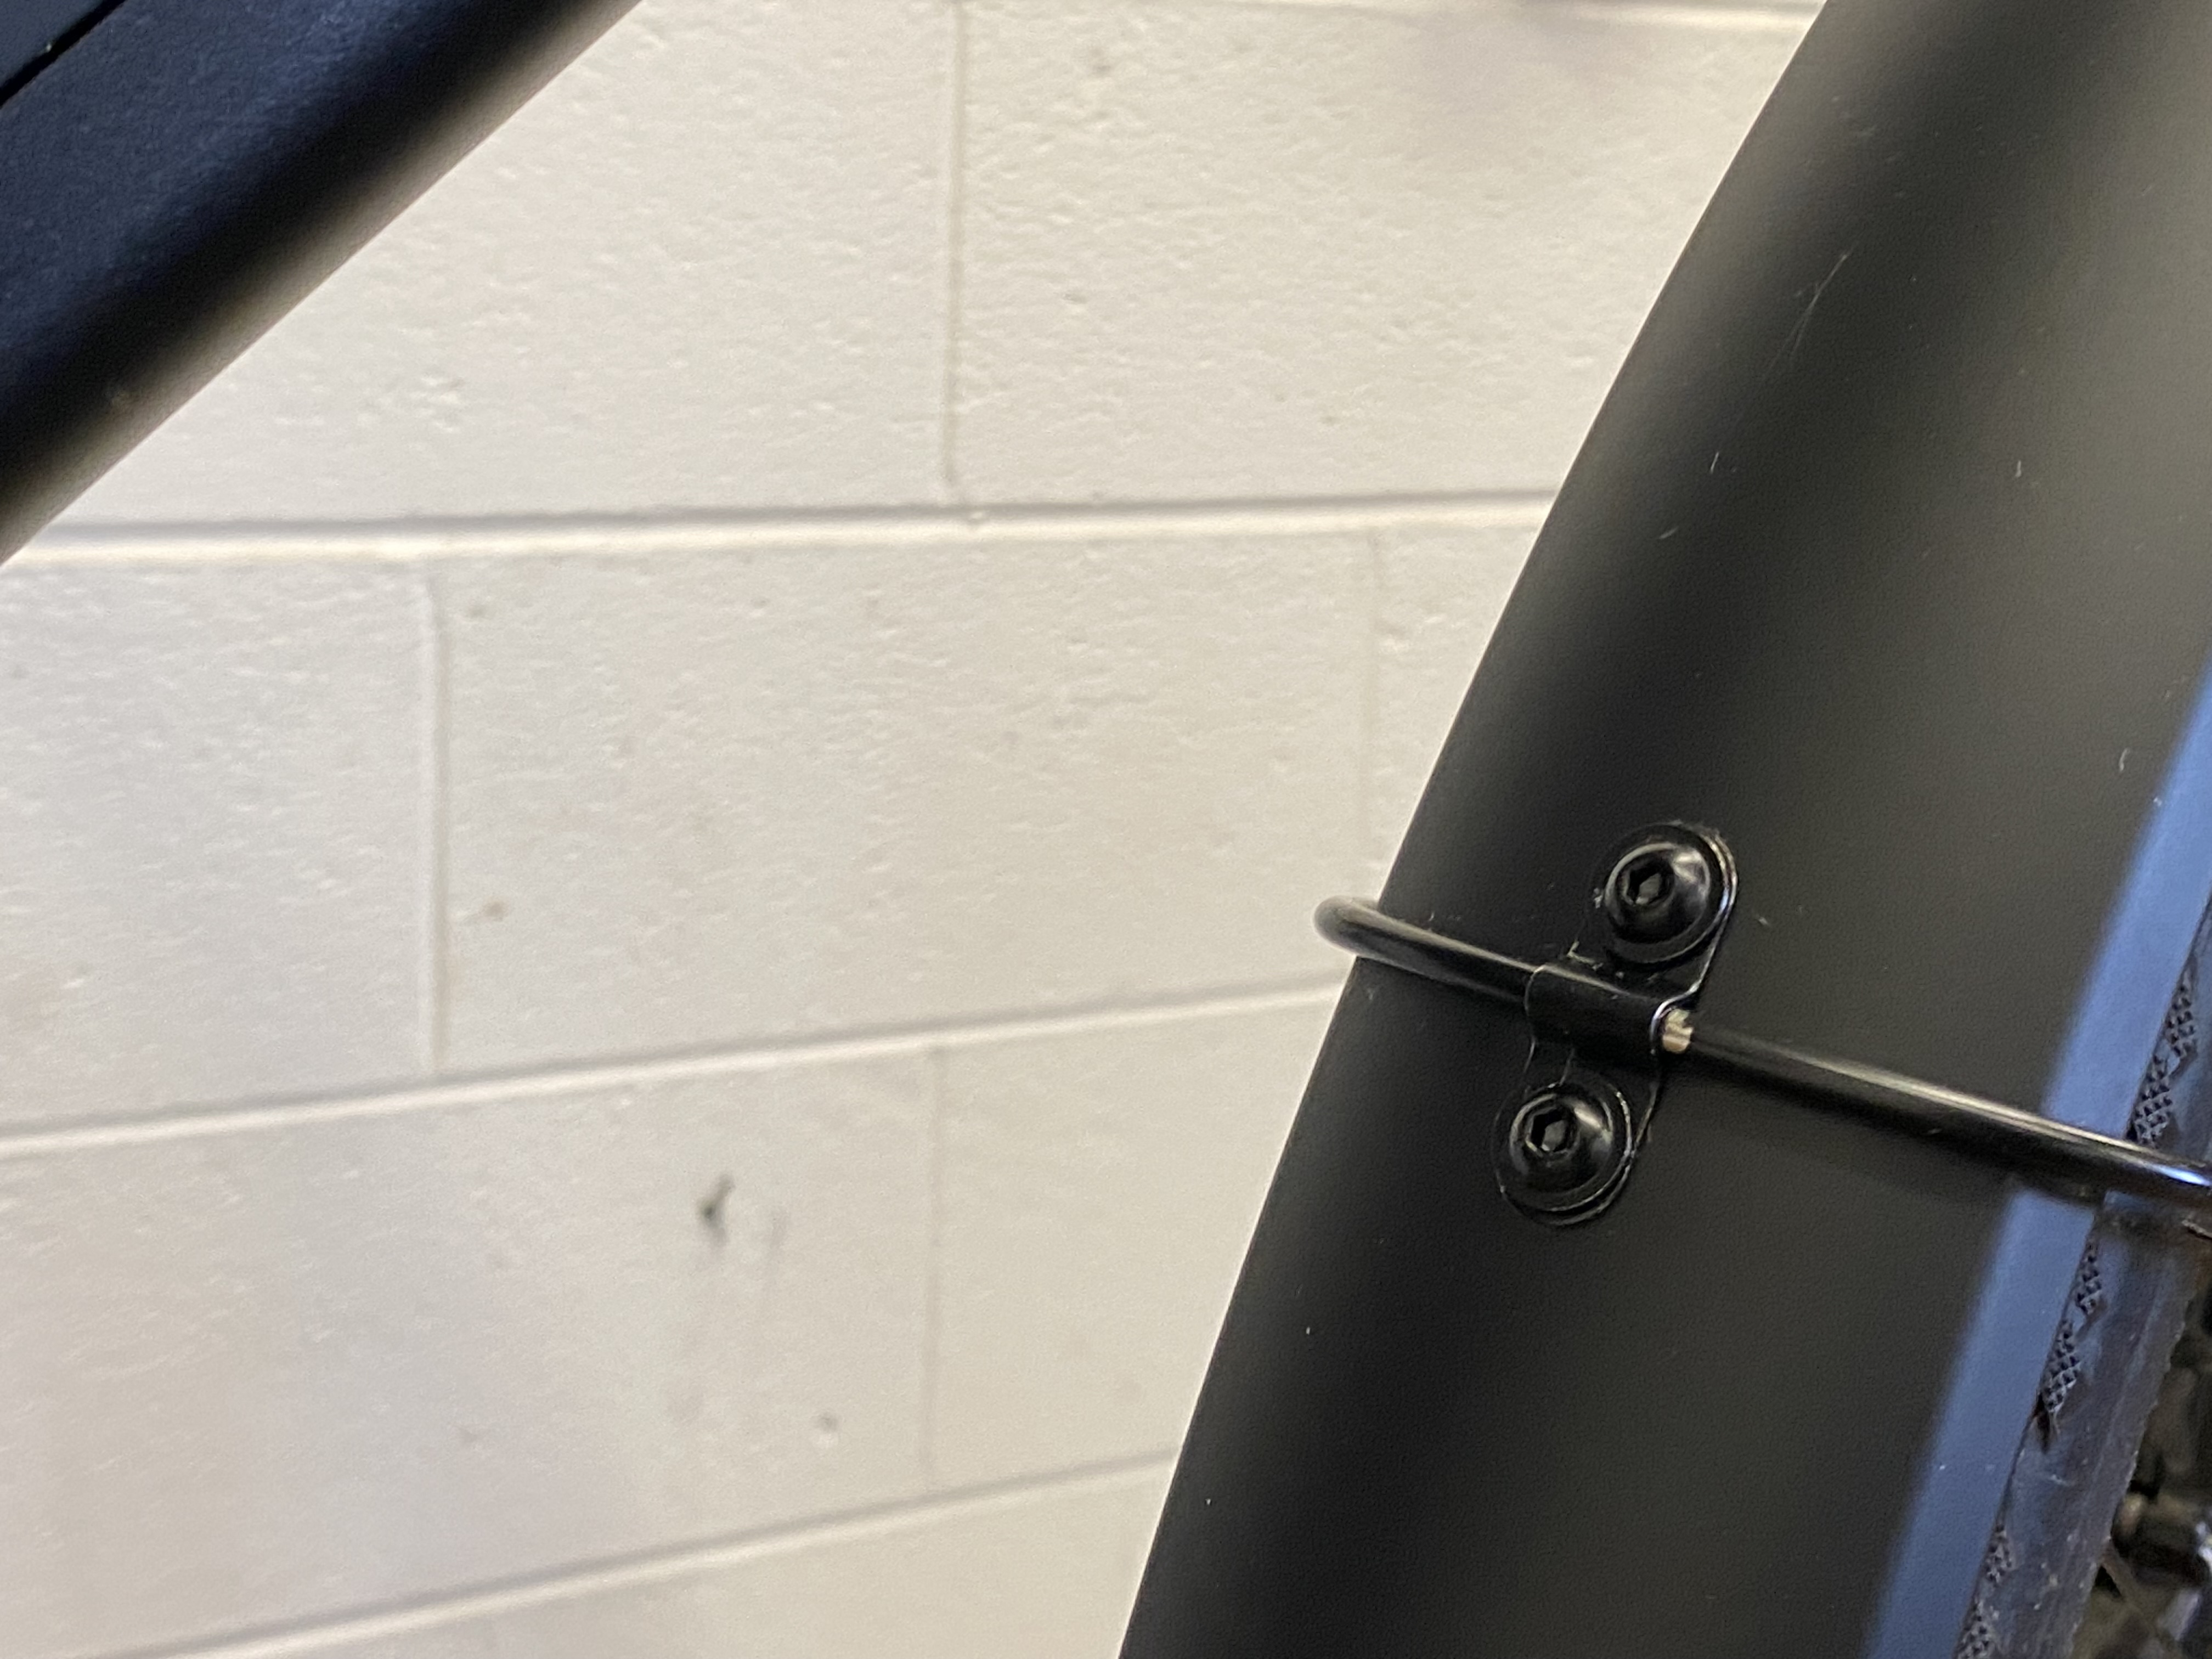
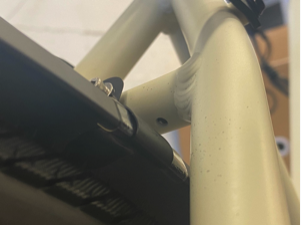
 Seat stay bracket installed and crimped to the blade
 - Attach the fender to the chainstay bridge using one of the black plastic spacers and a pan head M5 bolt/washer.
 Rear fender attached at the chainstay bridgePro-tip: Apply some blue Loctite to the threads of this bolt! It's a pain to get to, and Loctite will prevent it from loosening up over time.
 - Apply the anti-rattle sticker to the fender blade beneath the seat stay bracket, then crimp the bracket to the blade using your fingers or pliers. Ensure the bracket is fully crimped to the underside of the blade.
 Crimped seat stay bridge
 - The seat stay bridge attachment point on some Alpha II ebikes is located on the underside of the bridge. If this describes your ebike, you'll need to drill a hole in the fender blade and use a pan head M5 bolt and plastic spacer to attach the fender.
- Use a 1/4" drill bit to drill the hole.
- Small Alpha II: 32cm up the blade from the bottom of the chainstay attachment tab
- Medium/Large Alpha II: 37cm up the blade from the bottom of the chainstay attachment tab
 Alpha II drilled seat stay bridge attachment
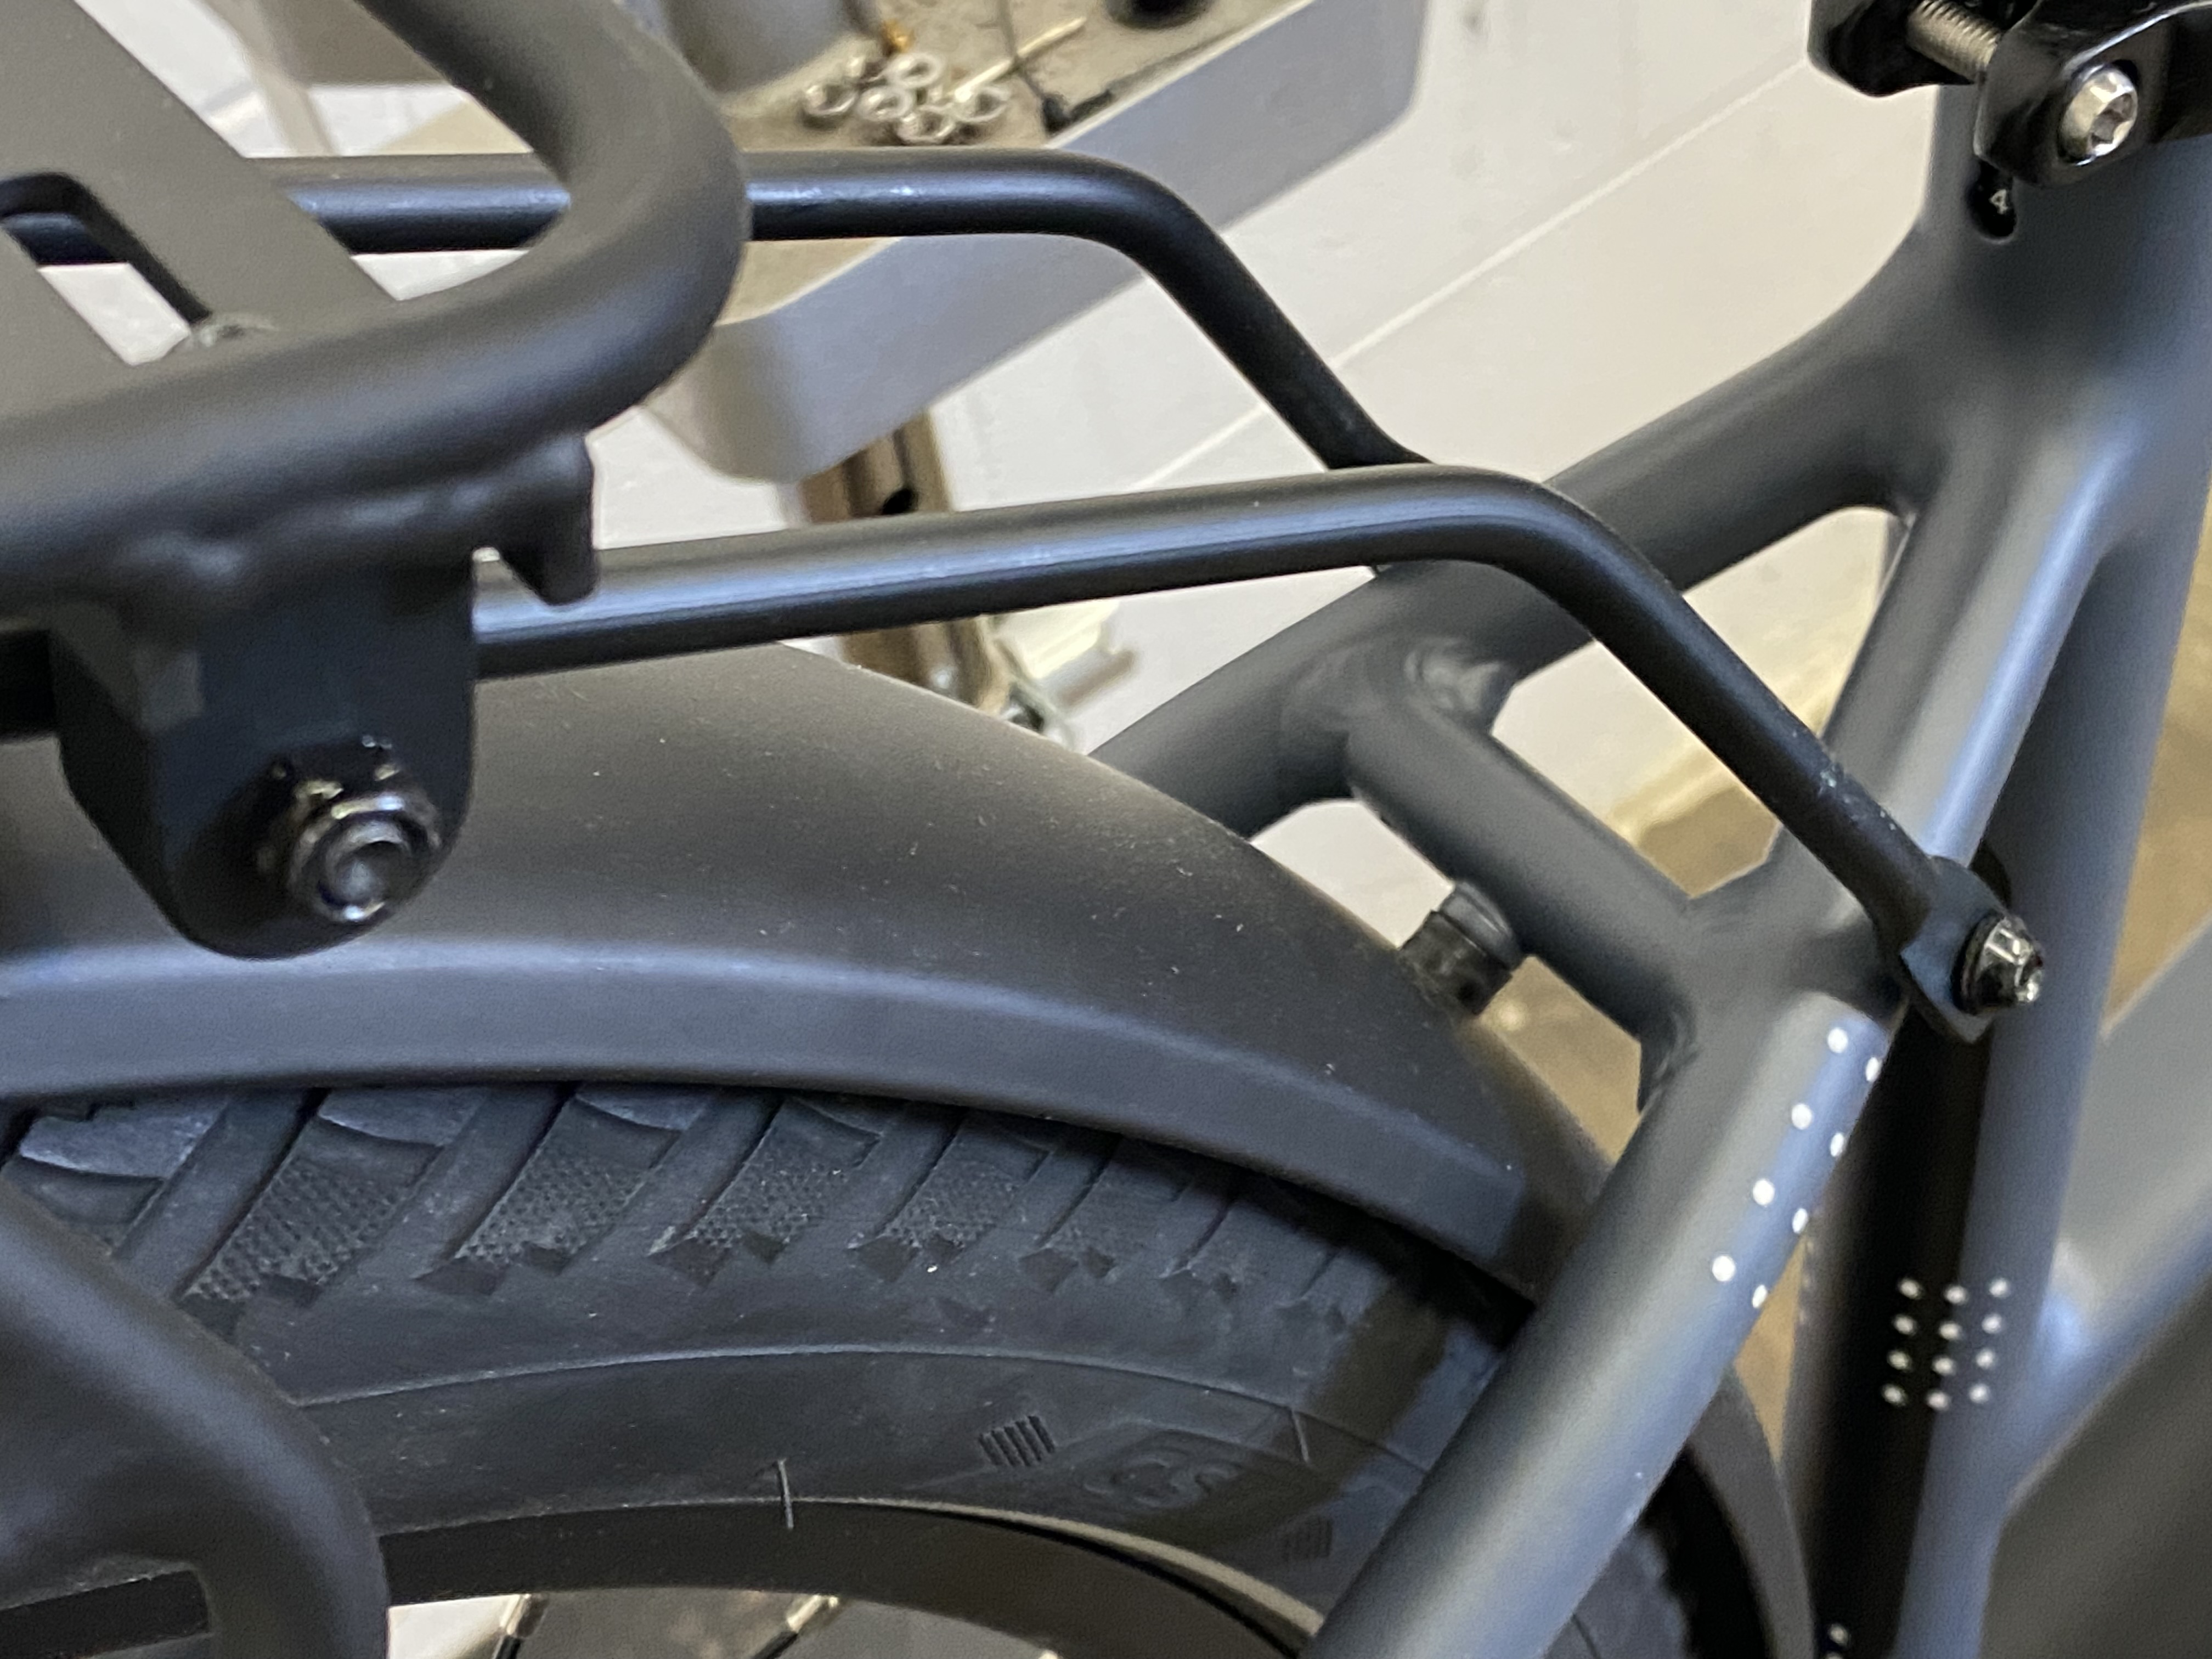
- Attach the rear fender stay to the lower eyelet position using either the cap head M5 bolts and washers or the included bolts on your frame! Adjust the stays as necessary for a clean fender line.
 Rear fender stays attached at the lower eyelet location
Pro-tips upon completion:
- Check all your hardware after your first few rides! It's normal for bolts to loosen up after a little while, so ensure they are all nice and snug to avoid unnecessary rattling.